


Every day, thousands of candidates apply on LinkedIn, which makes sorting and collecting resumes a time-consuming task for recruiters. It not only diverts attention from more strategic aspects of recruitment but also slows down the hiring process.
However, you can now automate this task and see all resumes from LinkedIn job posts in one dashboard. This guide shows you four effective ways to export resumes from LinkedIn with Skima AI. This lets recruiters concentrate on what they do best: connecting with top talent.
How to Export Resumes From LinkedIn?
When you're handling high-volume applications or trying to reduce repetitive tasks, Skima AI simplifies the resume export process.
Here are 4 simple methods you can start using today to automatically download resumes from LinkedIn job posts in 2026:
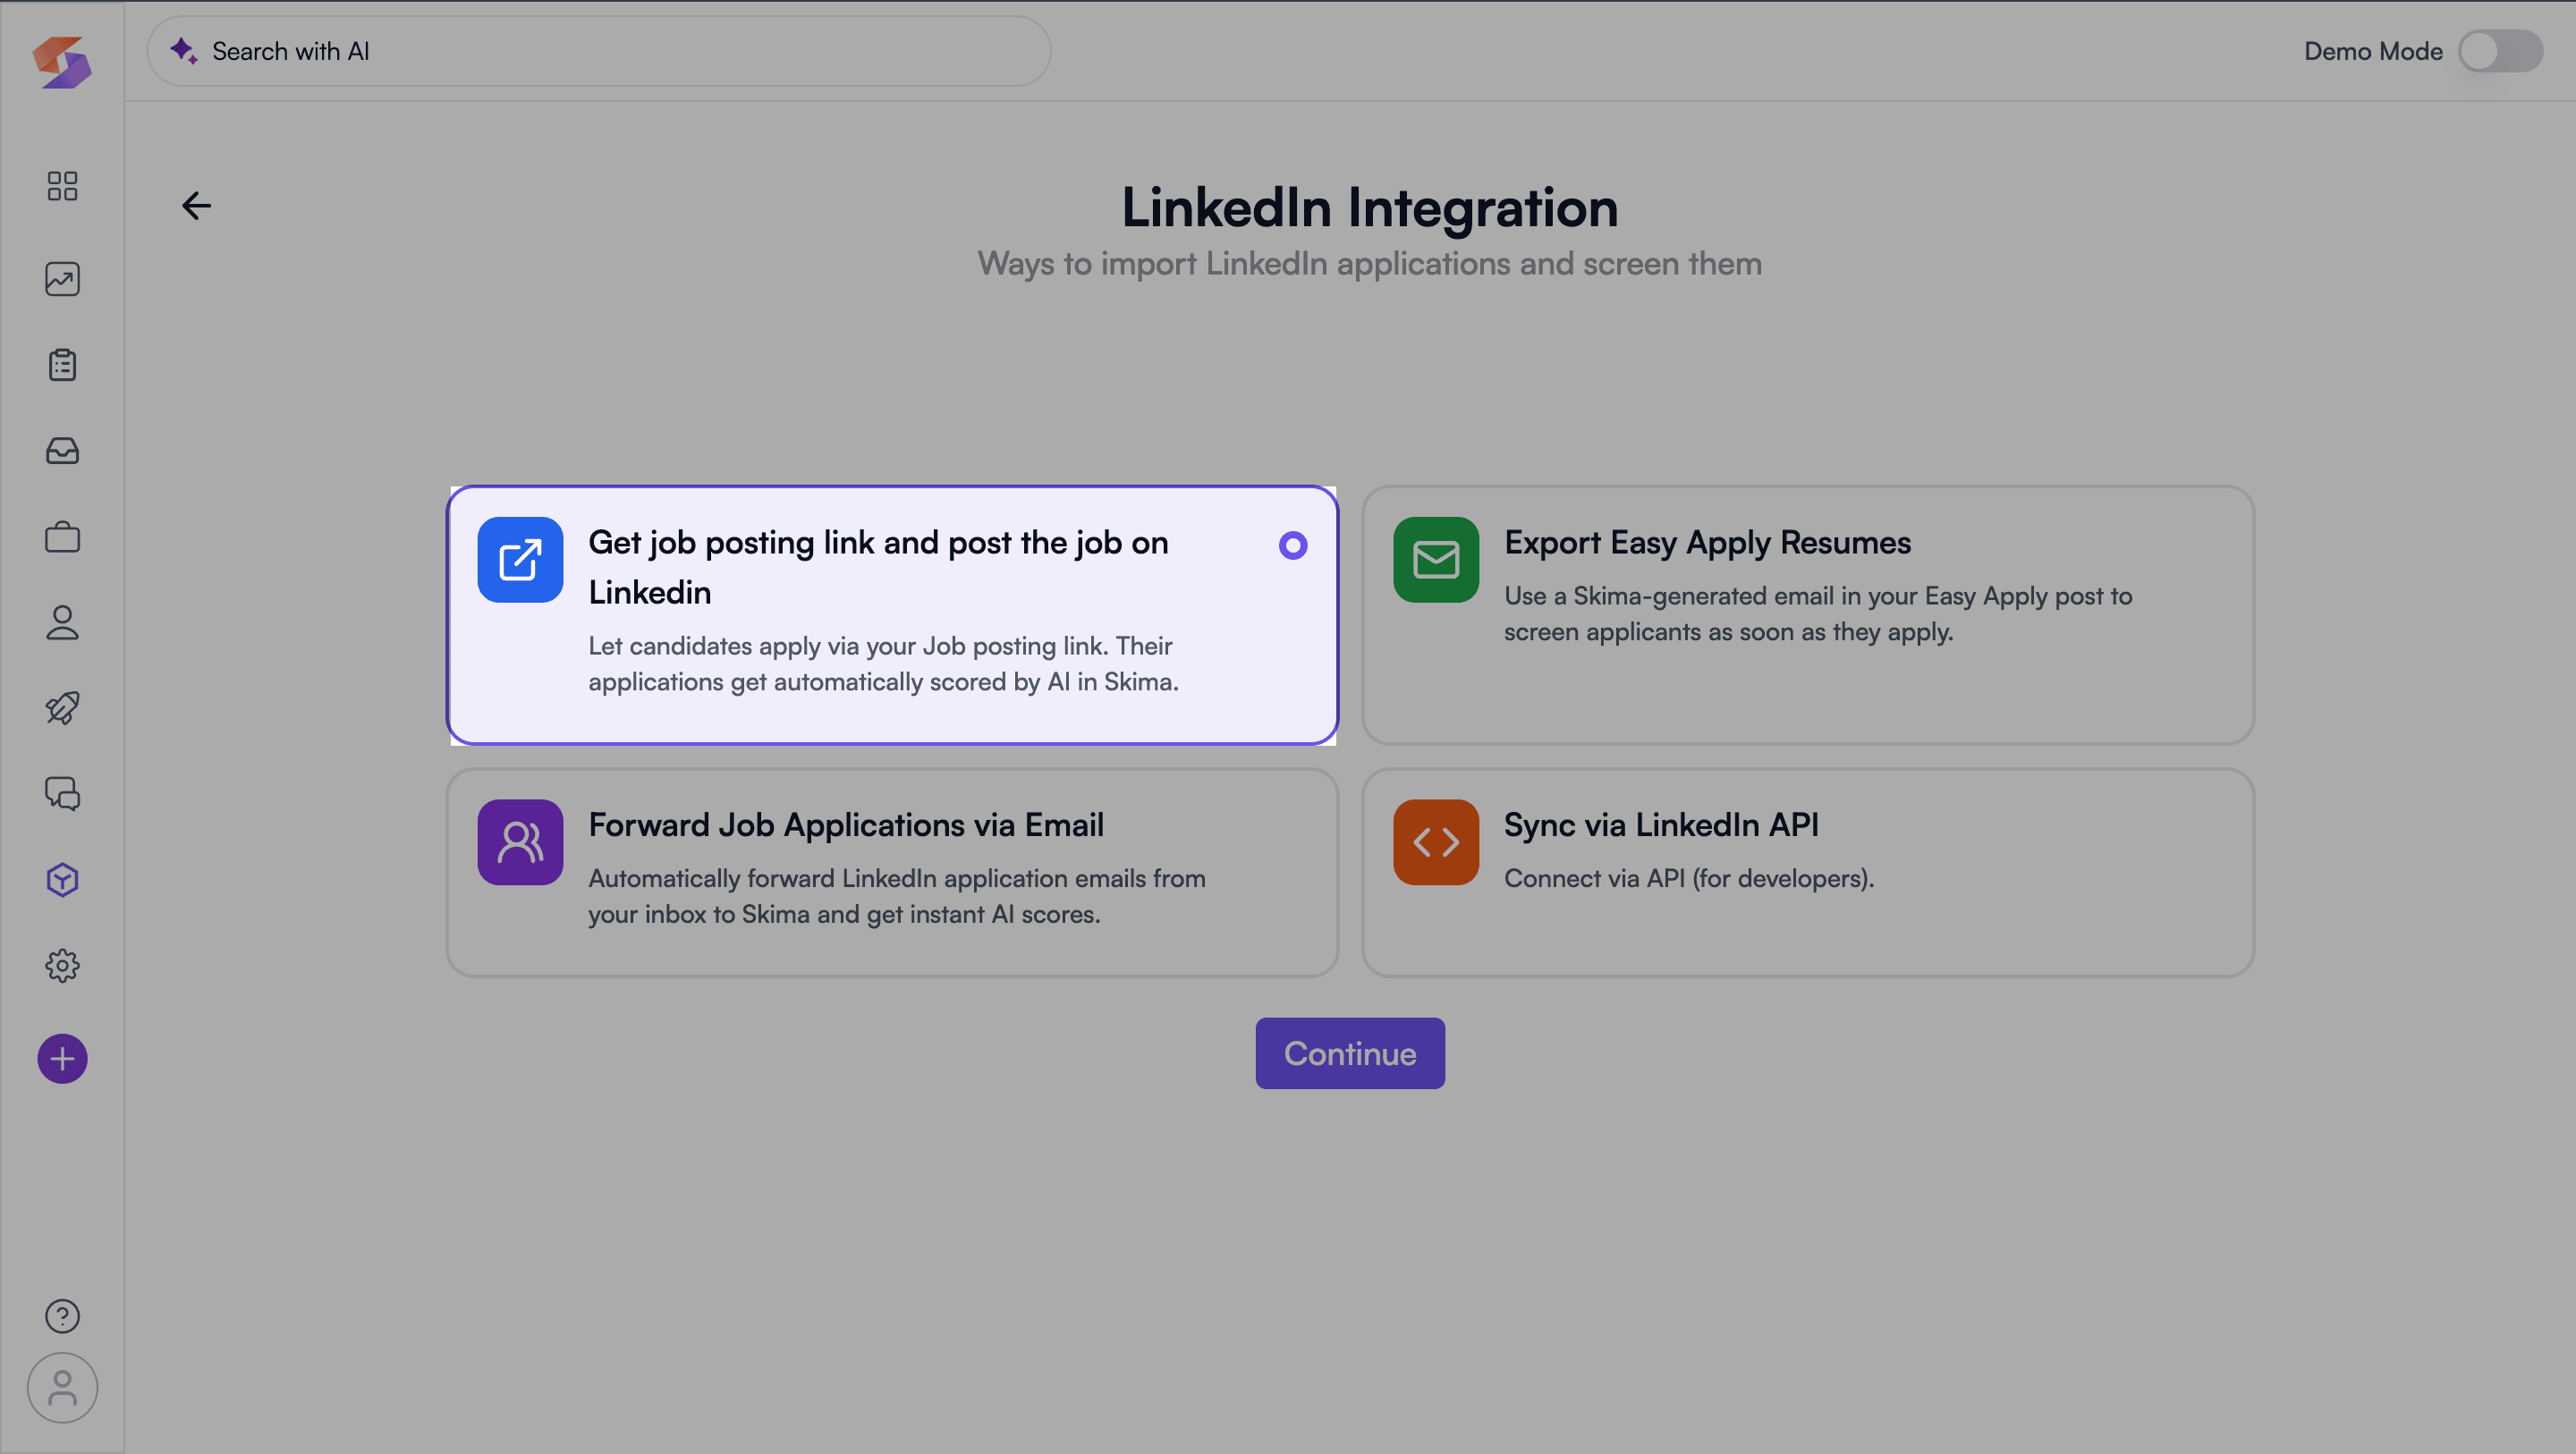
- Get a Public Job Posting Link
- Export Easy Apply Resumes
- Forward Job Applications via Email
- Sync via LinkedIn API
Let's explore each method with images in detail to export CVs from LinkedIn job posts.
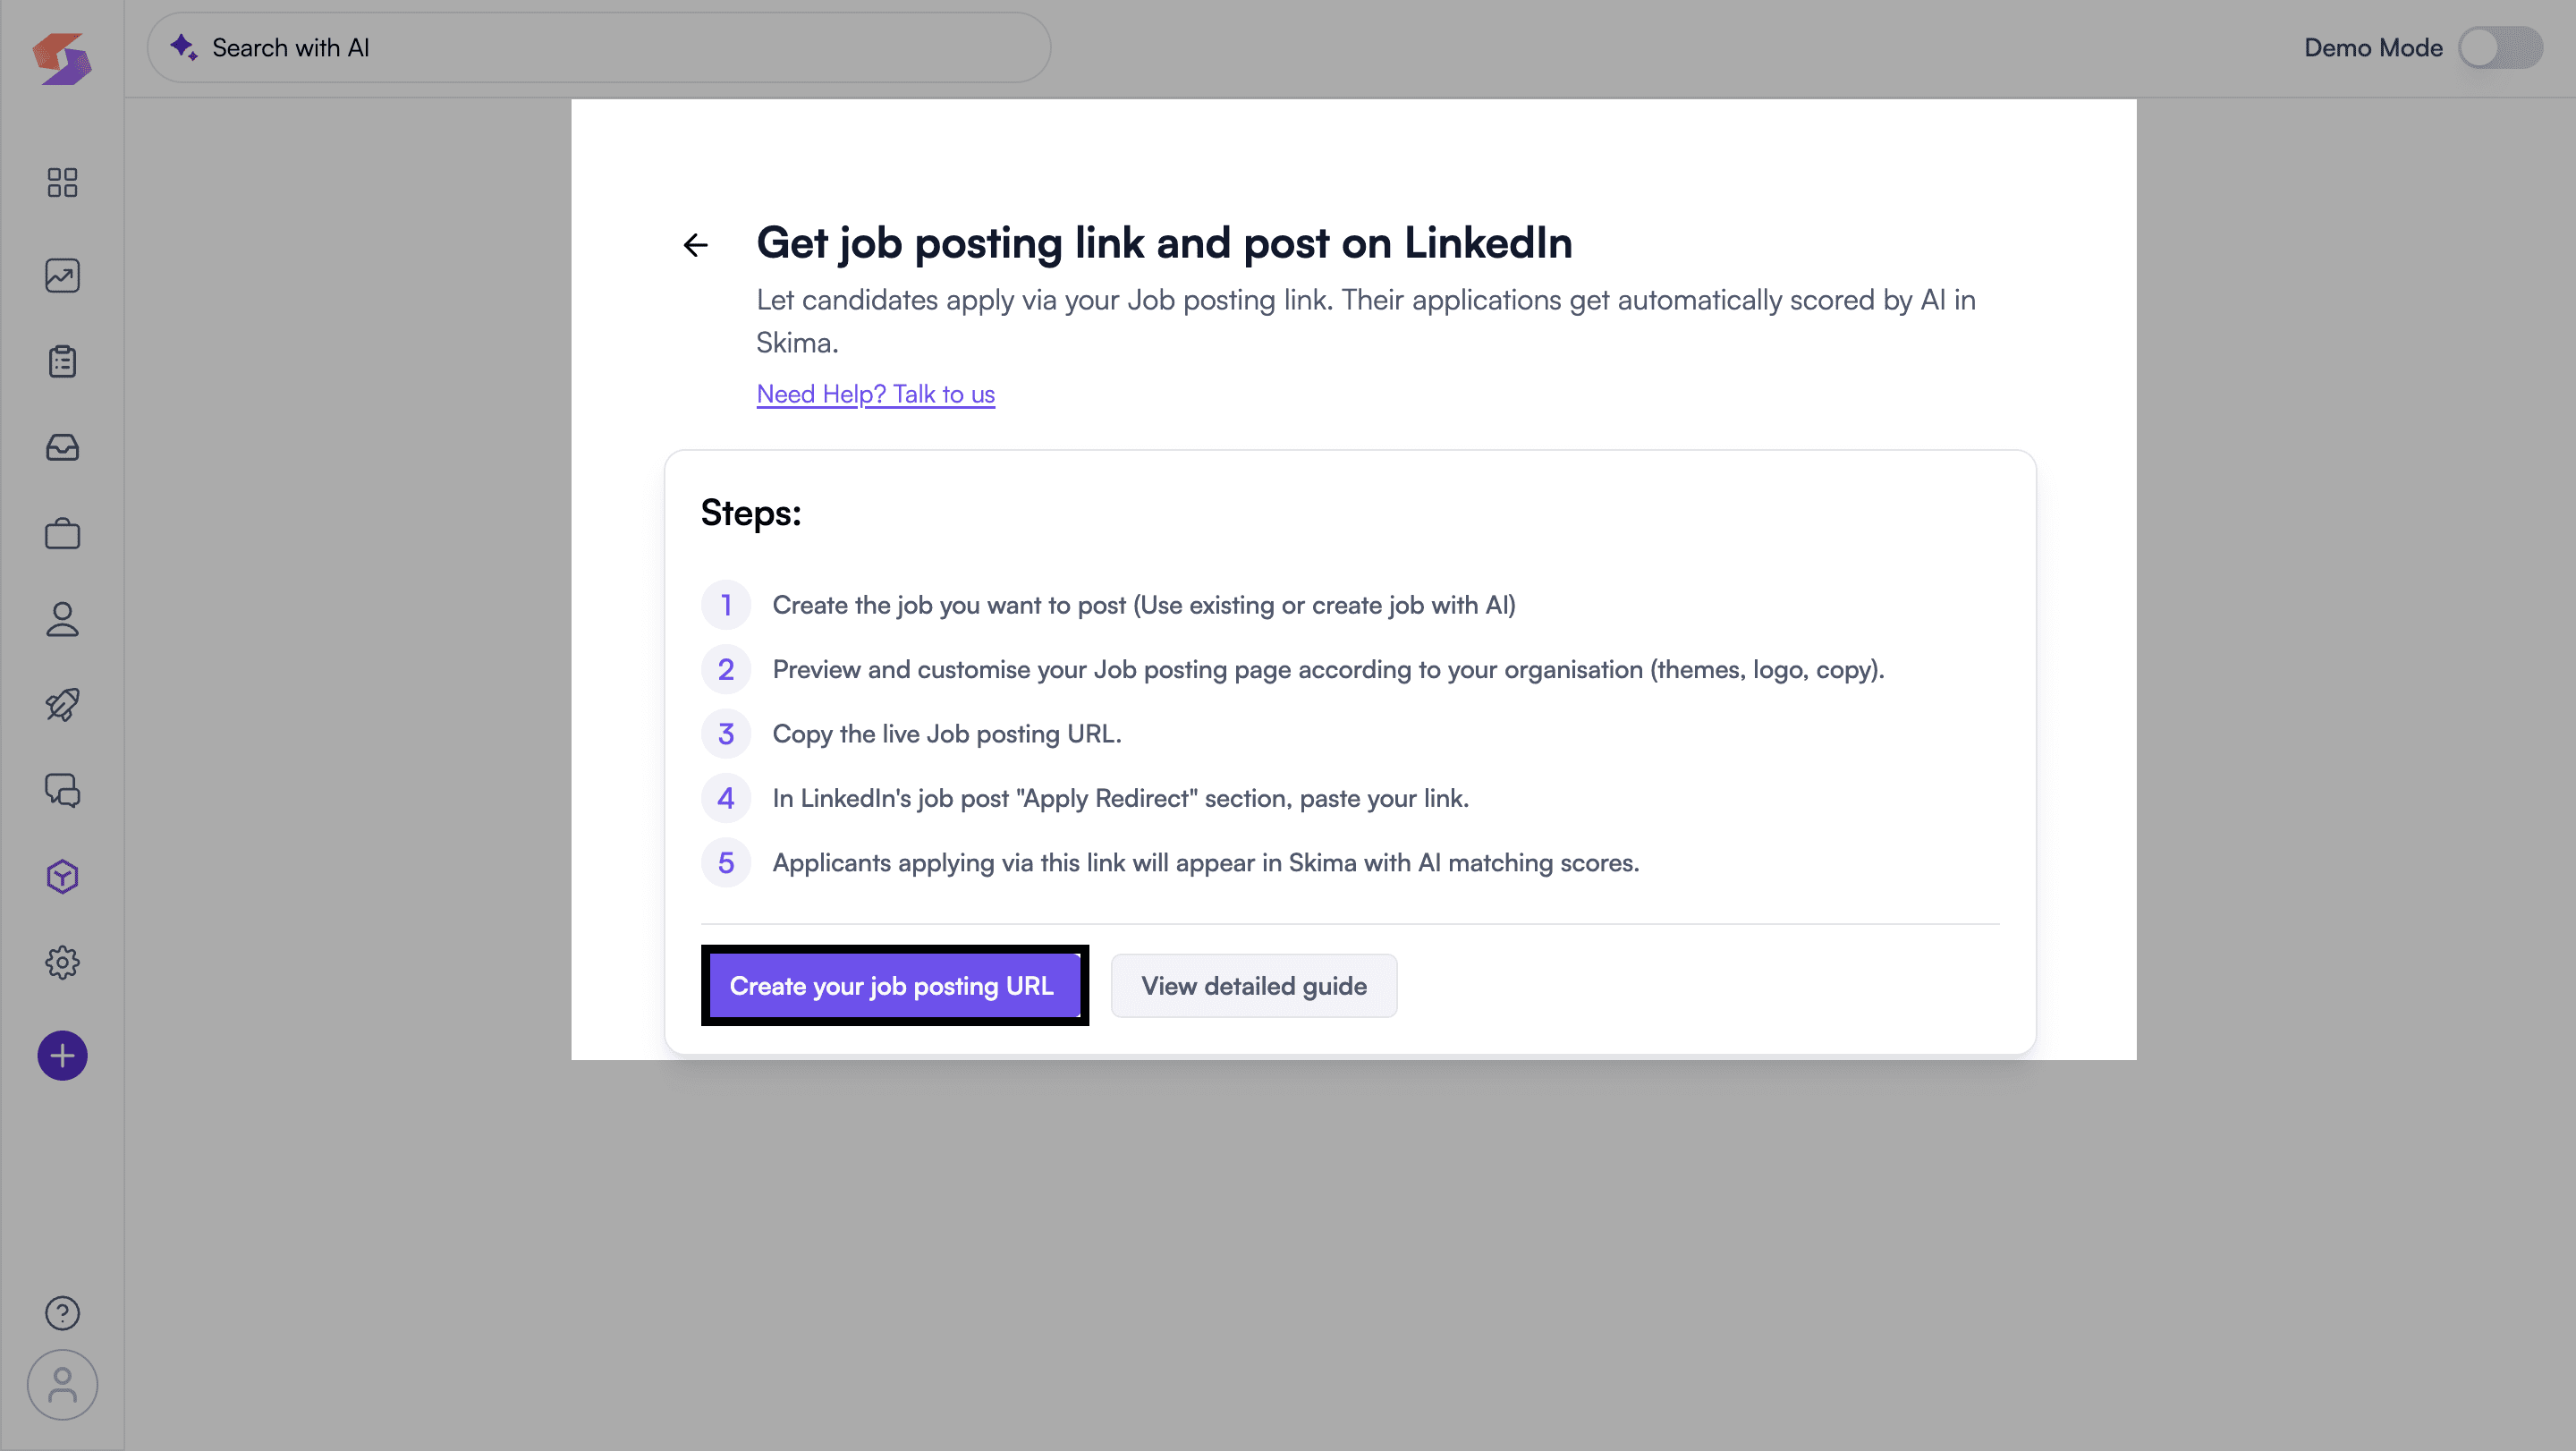
1. Get a Public Job Posting Link
This method lets you create a public job link from the Skima AI dashboard. Post this link on LinkedIn. Any candidate applying through it will be auto-scored and added to Skima. Here are the 4 easy steps extract resume from LinkedIn with this approach:
Step 1: Access LinkedIn Integrations
Sign up on Skima AI (it's free). Click on the “Integrations” tab in the left sidebar. Then, find the LinkedIn Integration section and click “Get job posting link.”
Step 2: Create Job Posting URL
You will see the detailed steps for creating a job posting link. Click “Create your job posting URL”.
Now, it's time for you to choose a job:
- Create a new job: Fill in details manually, upload a JD, or use AI to draft one.
- Use an existing job: Select a job you have already created in Skima AI.
Step 3: Preview & Copy Your Job Posting URL
Once the job is set, your public job posting page will be visible. You’ll see a preview of how it looks to applicants.
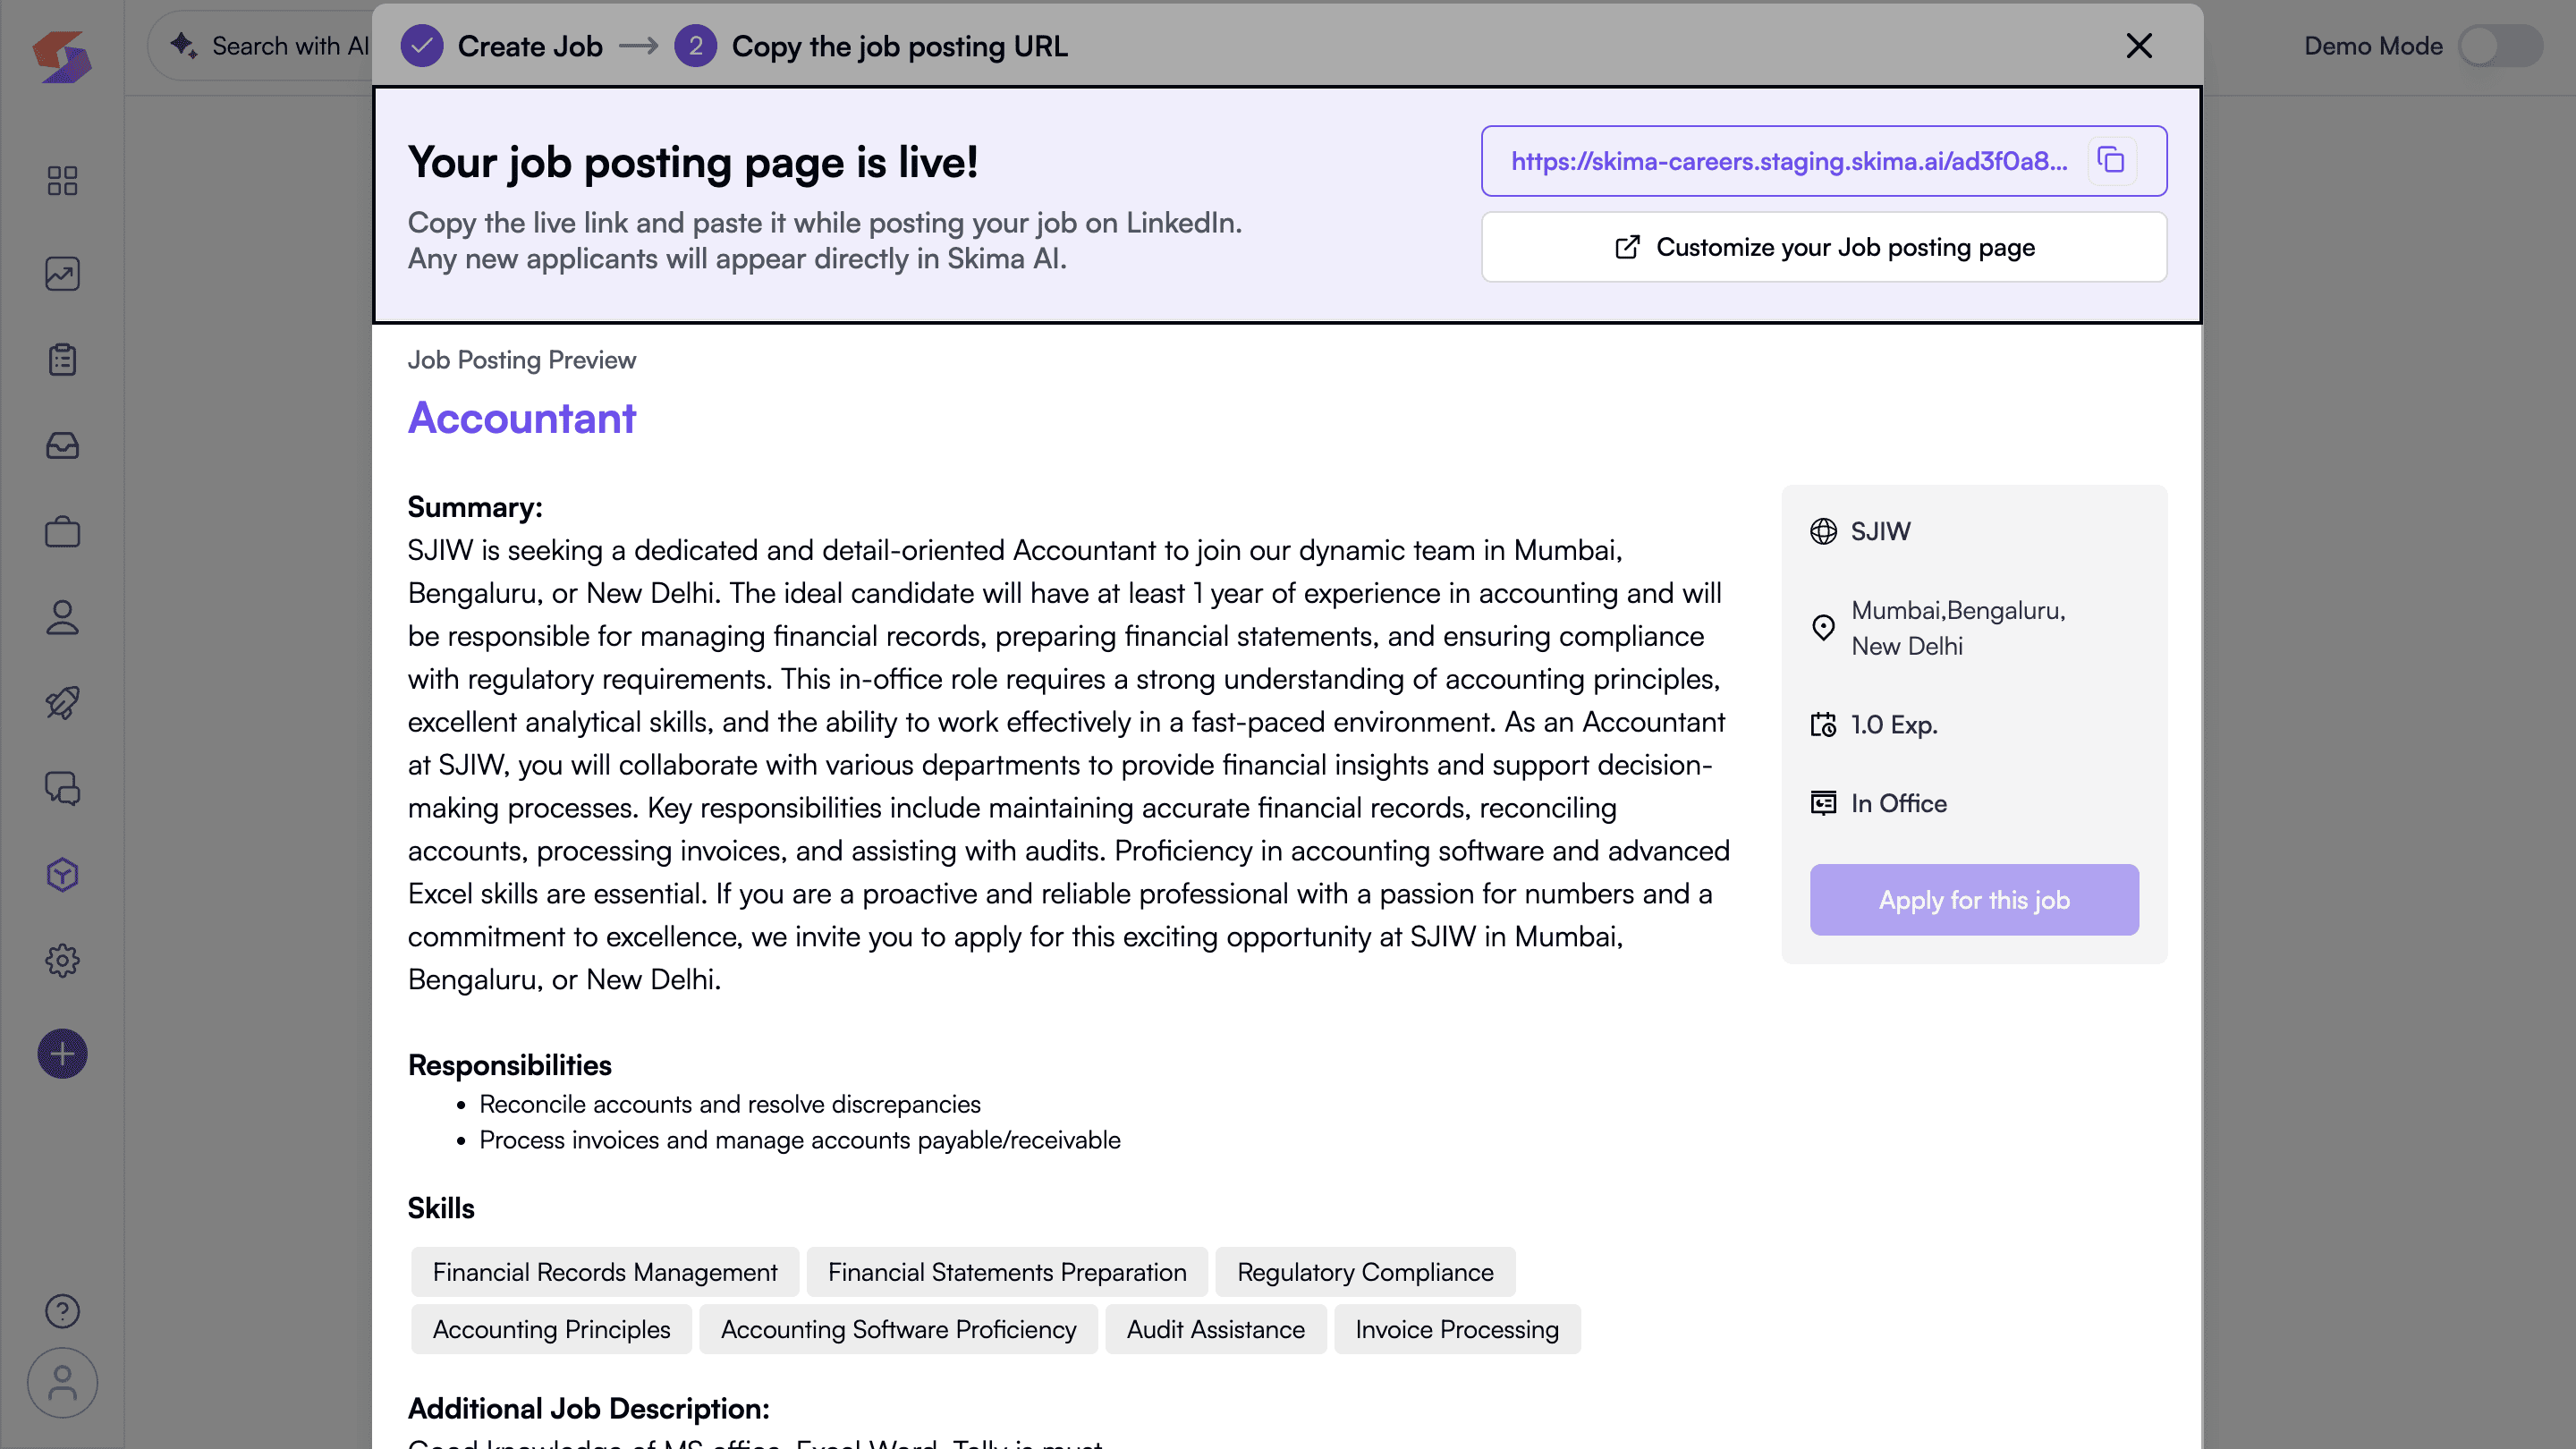
In the top-right corner, click Copy URL to copy your job posting link.
Step 4. Post Your Job link on LinkedIn
When creating the job on LinkedIn, fill in the usual details. In the Job Review and Job Settings step, go to Manage Applicants.
Select “On external website” and paste your copied Skima AI job link into the field.
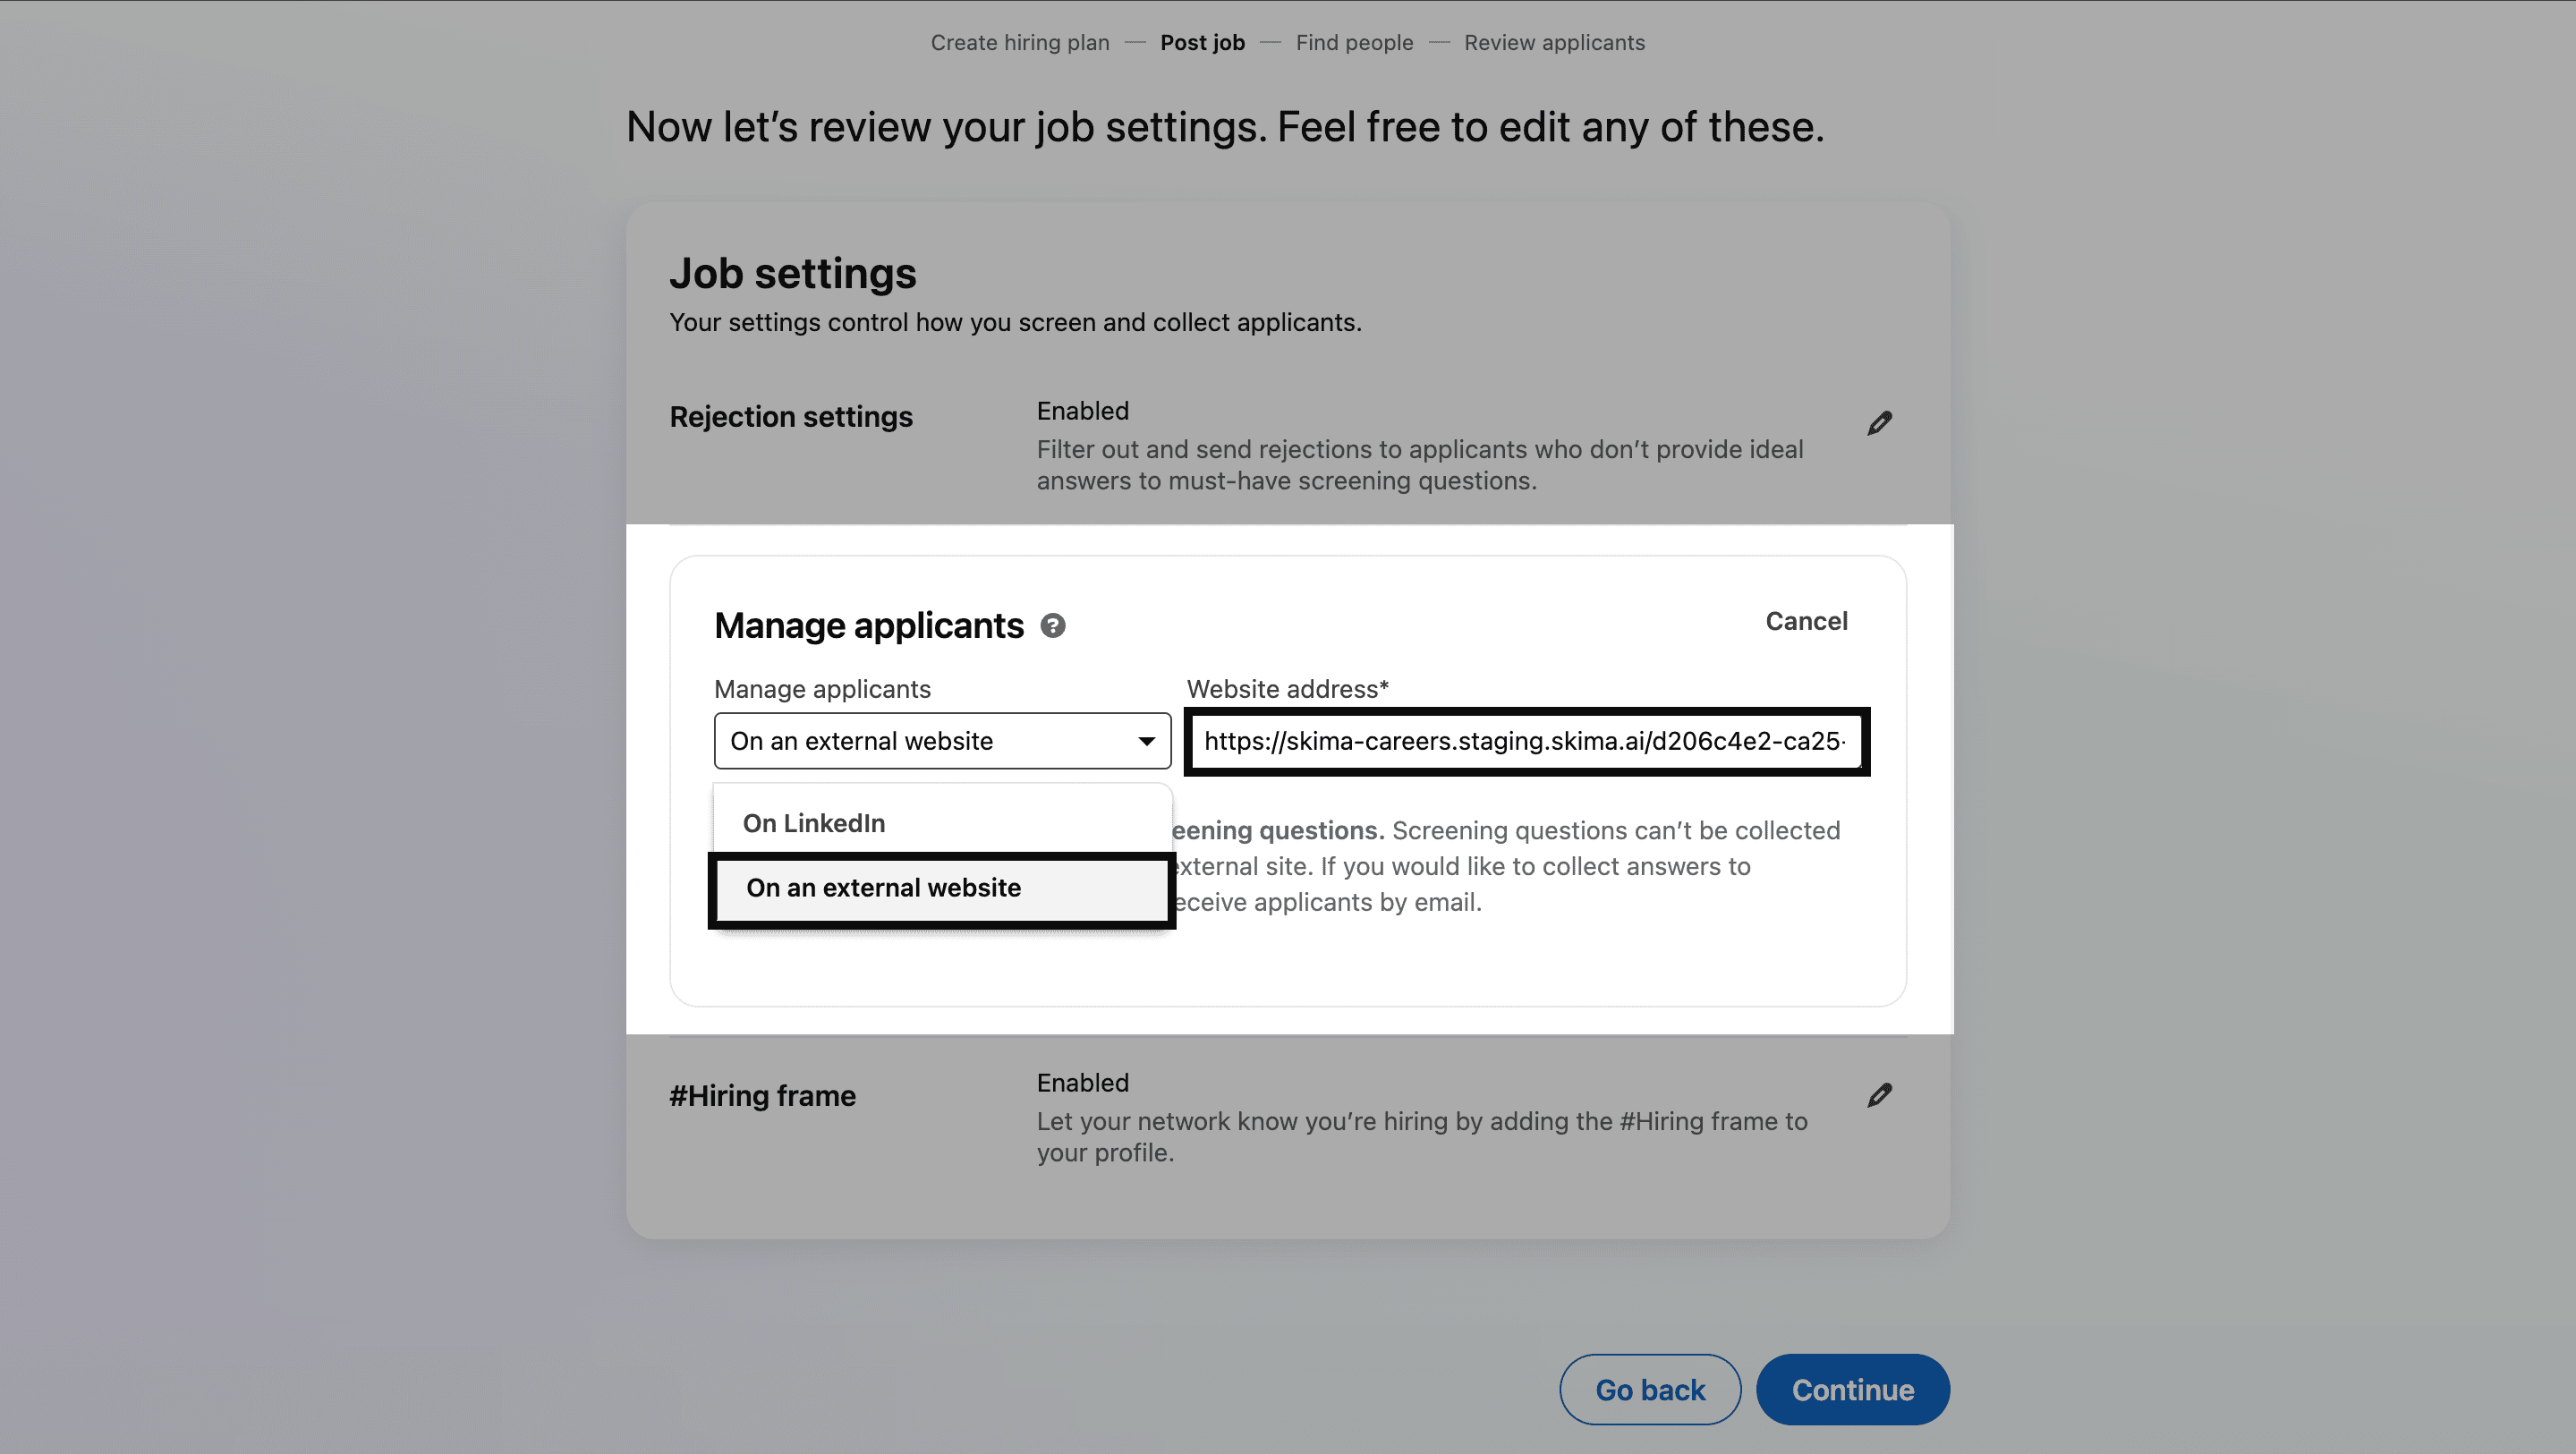
Now, when someone clicks “Apply” on LinkedIn, they’ll land on your Skima job page. Once they submit, they’re auto-scored and saved under that job in your dashboard.
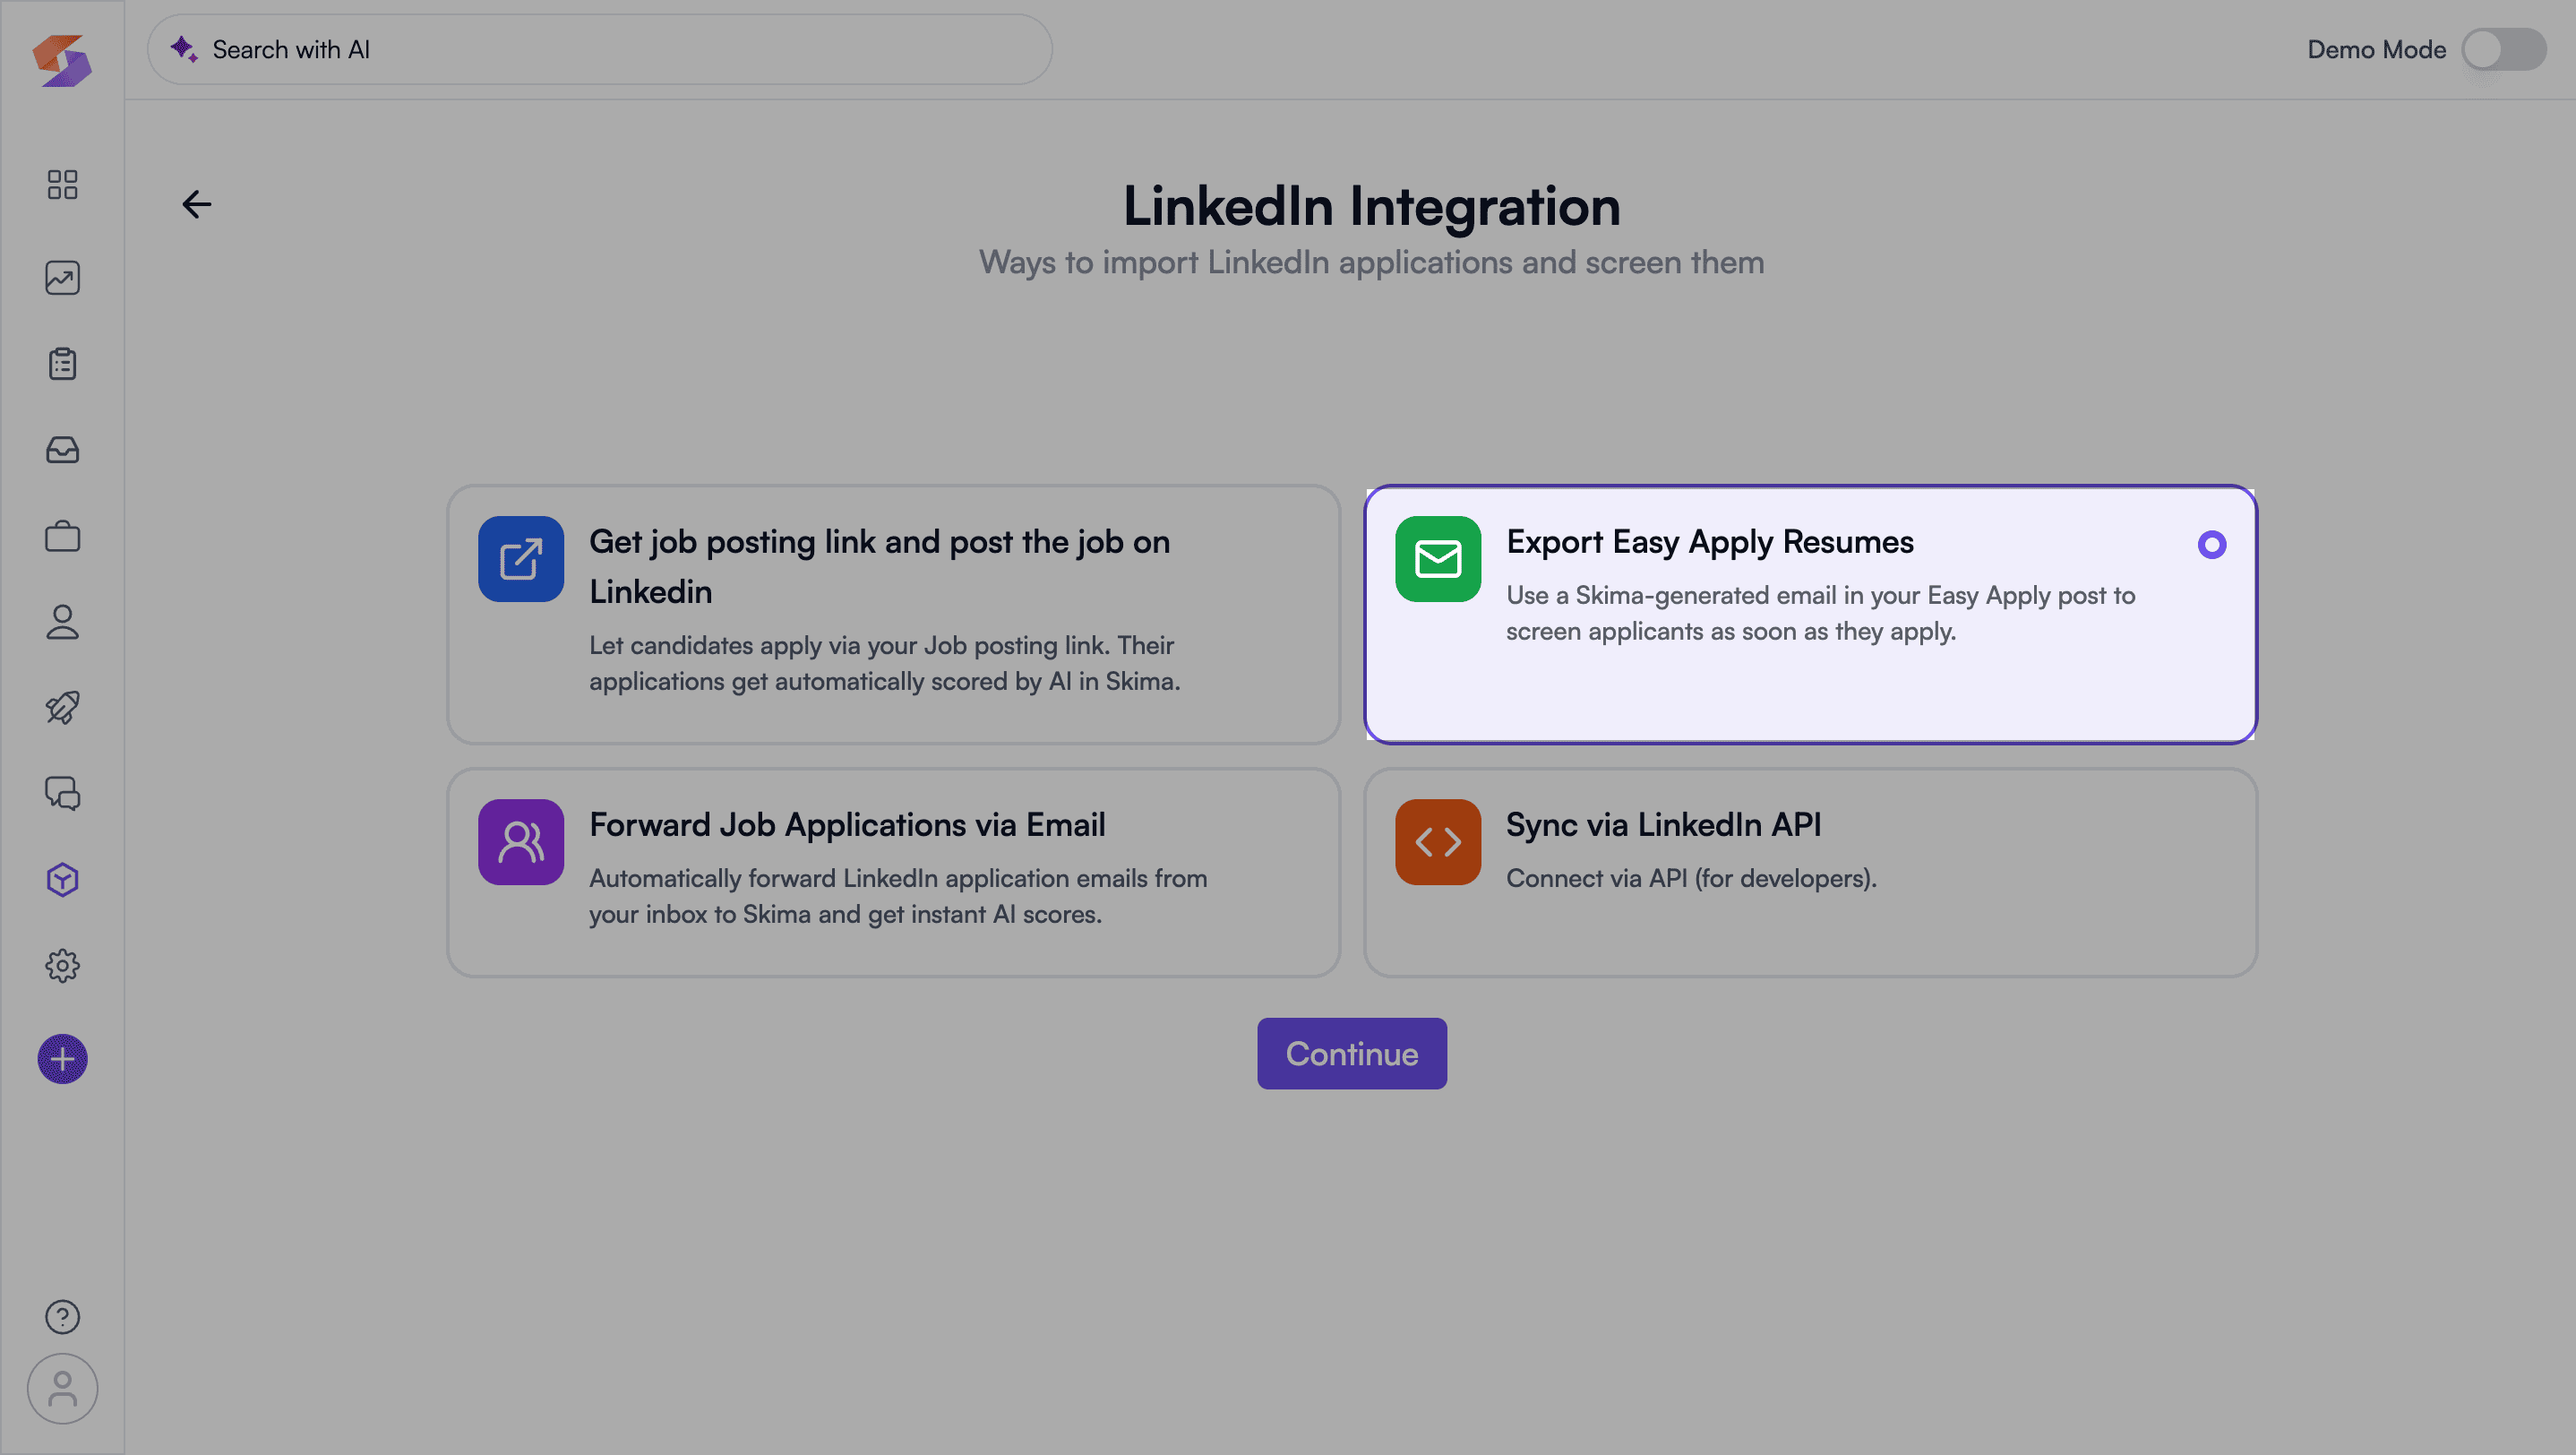
2. Export Easy Apply Resumes
This method helps you capture candidates who apply via Easy Apply jobs on LinkedIn. Skima AI does this using a unique email forwarder. Here are 3 simple steps to download resumes from linkedin:
1. From the LinkedIn Integration page, click “Export Easy Apply Resumes."
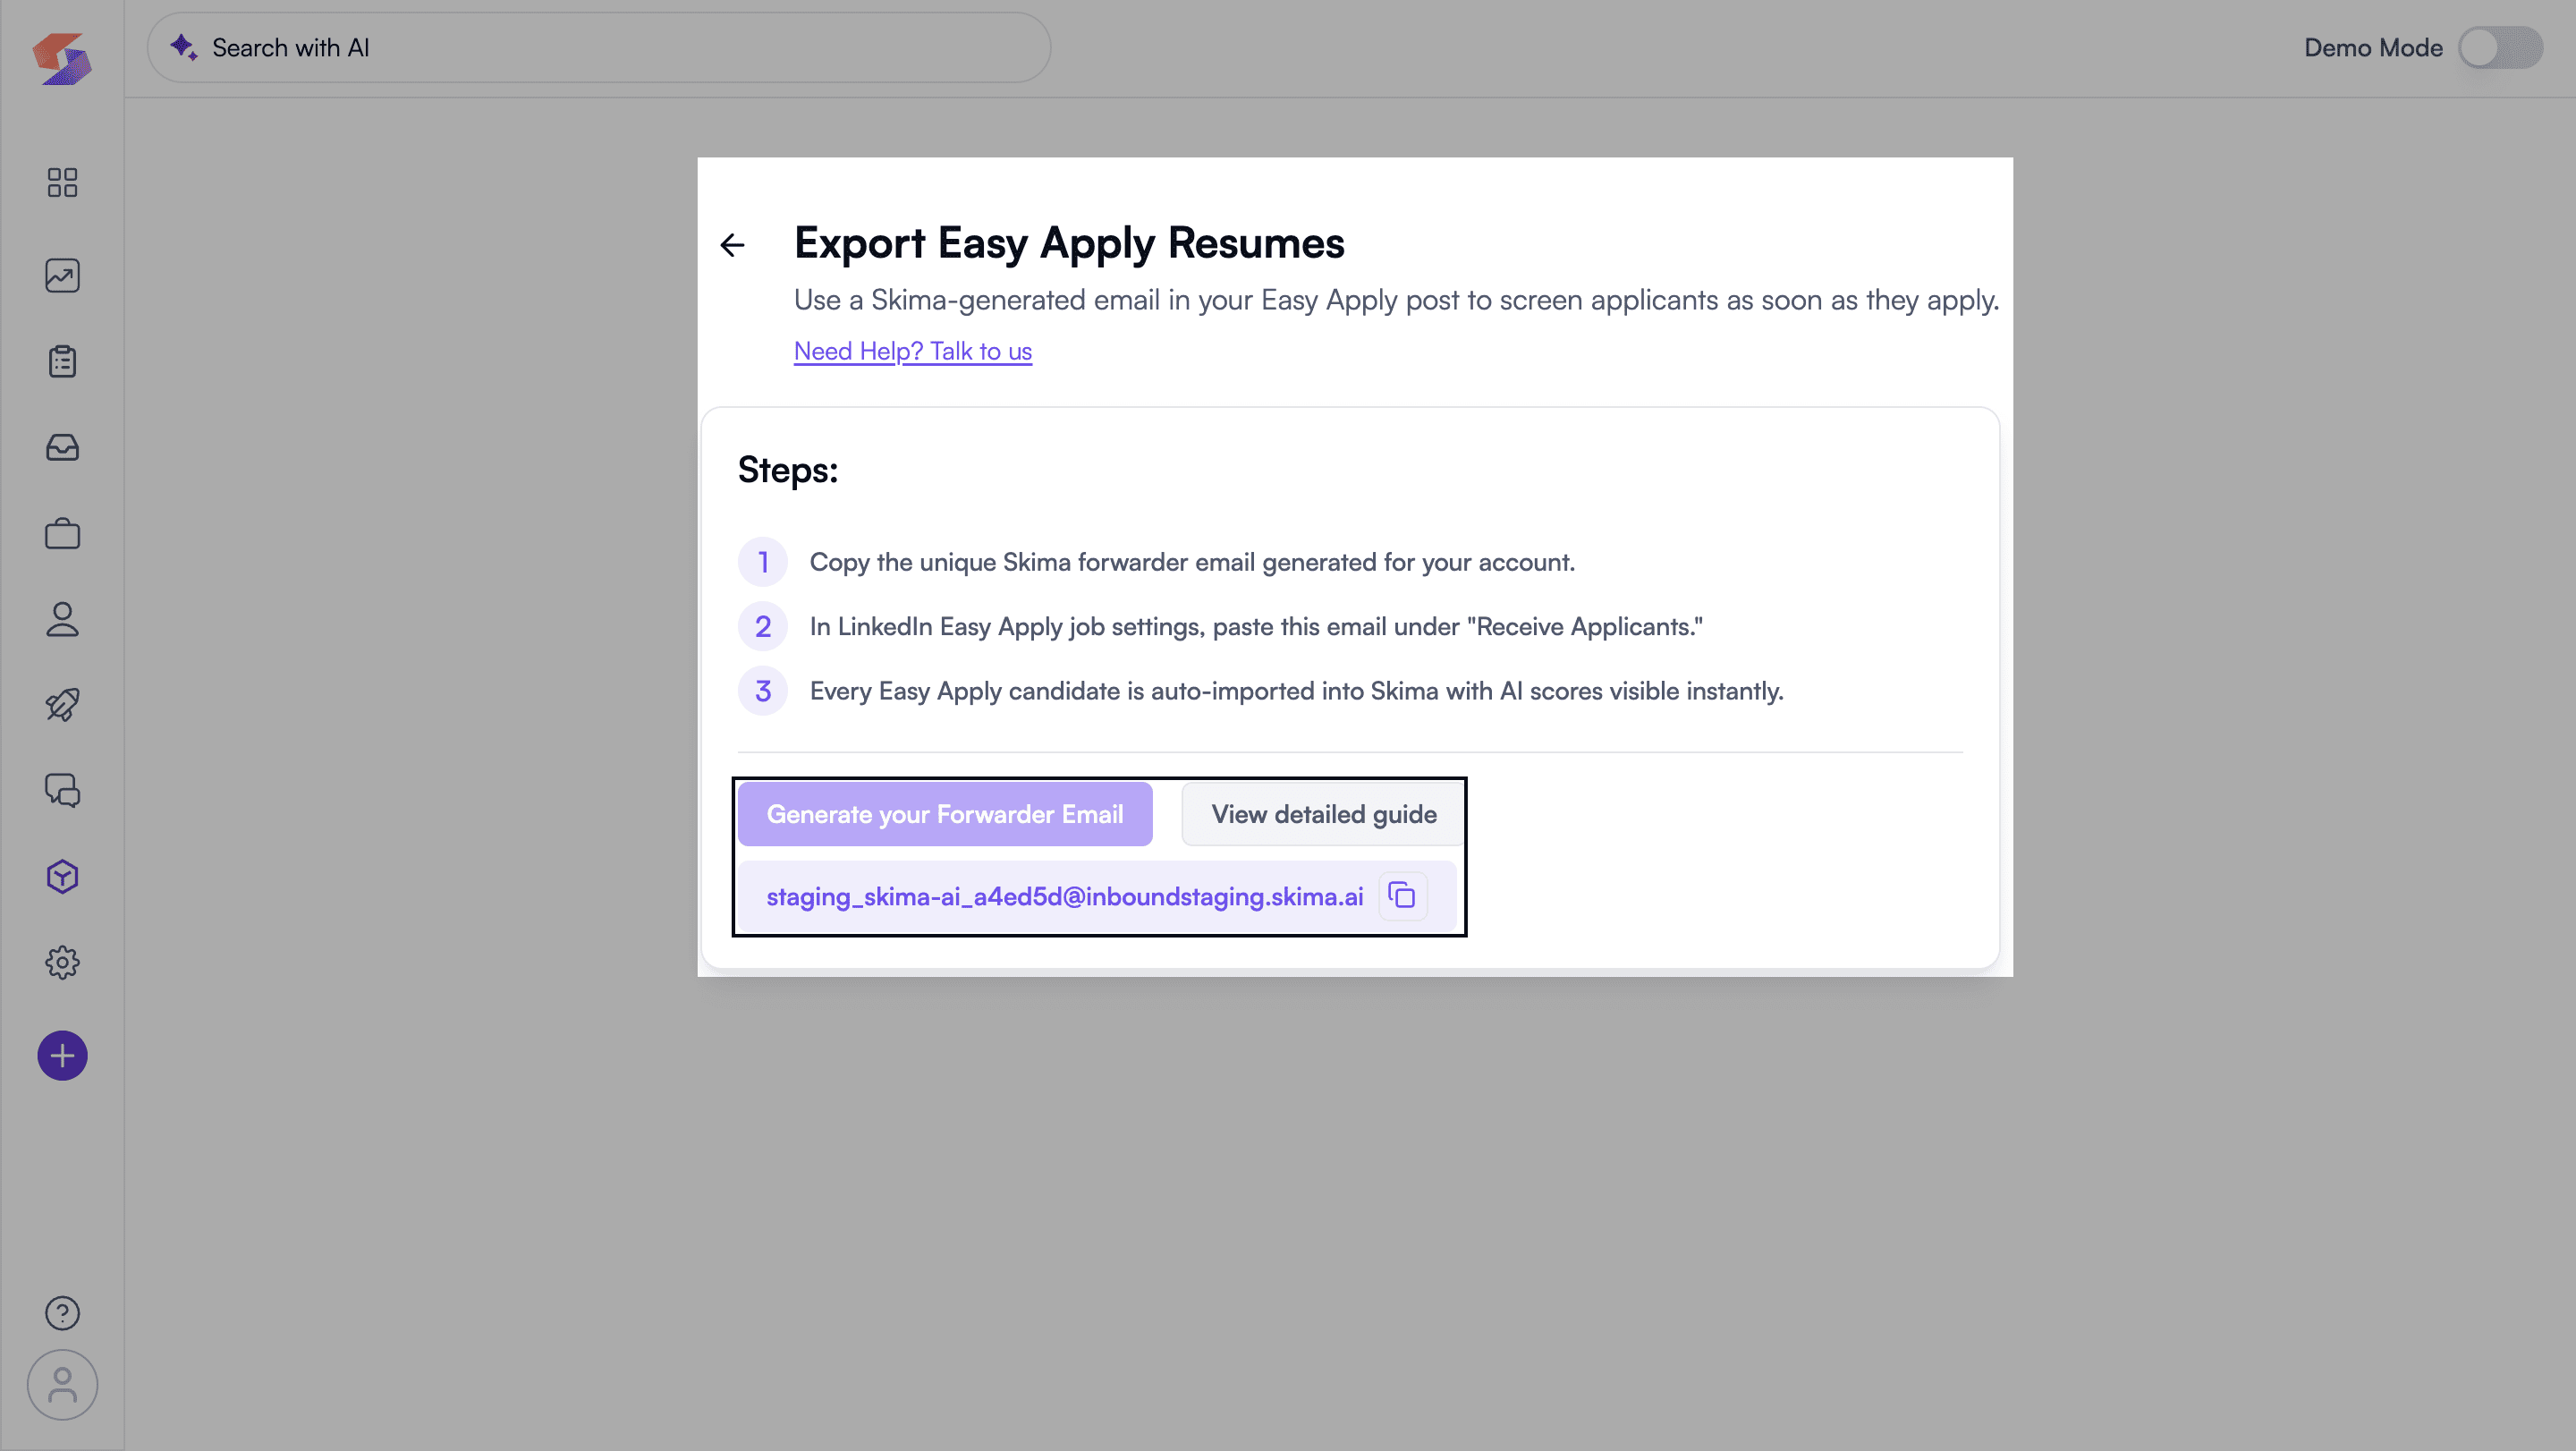
2. You will see detailed steps to implement this method for importing candidates.
3. Click “Generate your forwarder email." A unique forwarder email will be generated for you. Copy the email that appears.
Next, use the forwarder in LinkedIn. In Manage Applicants, select “On LinkedIn.”
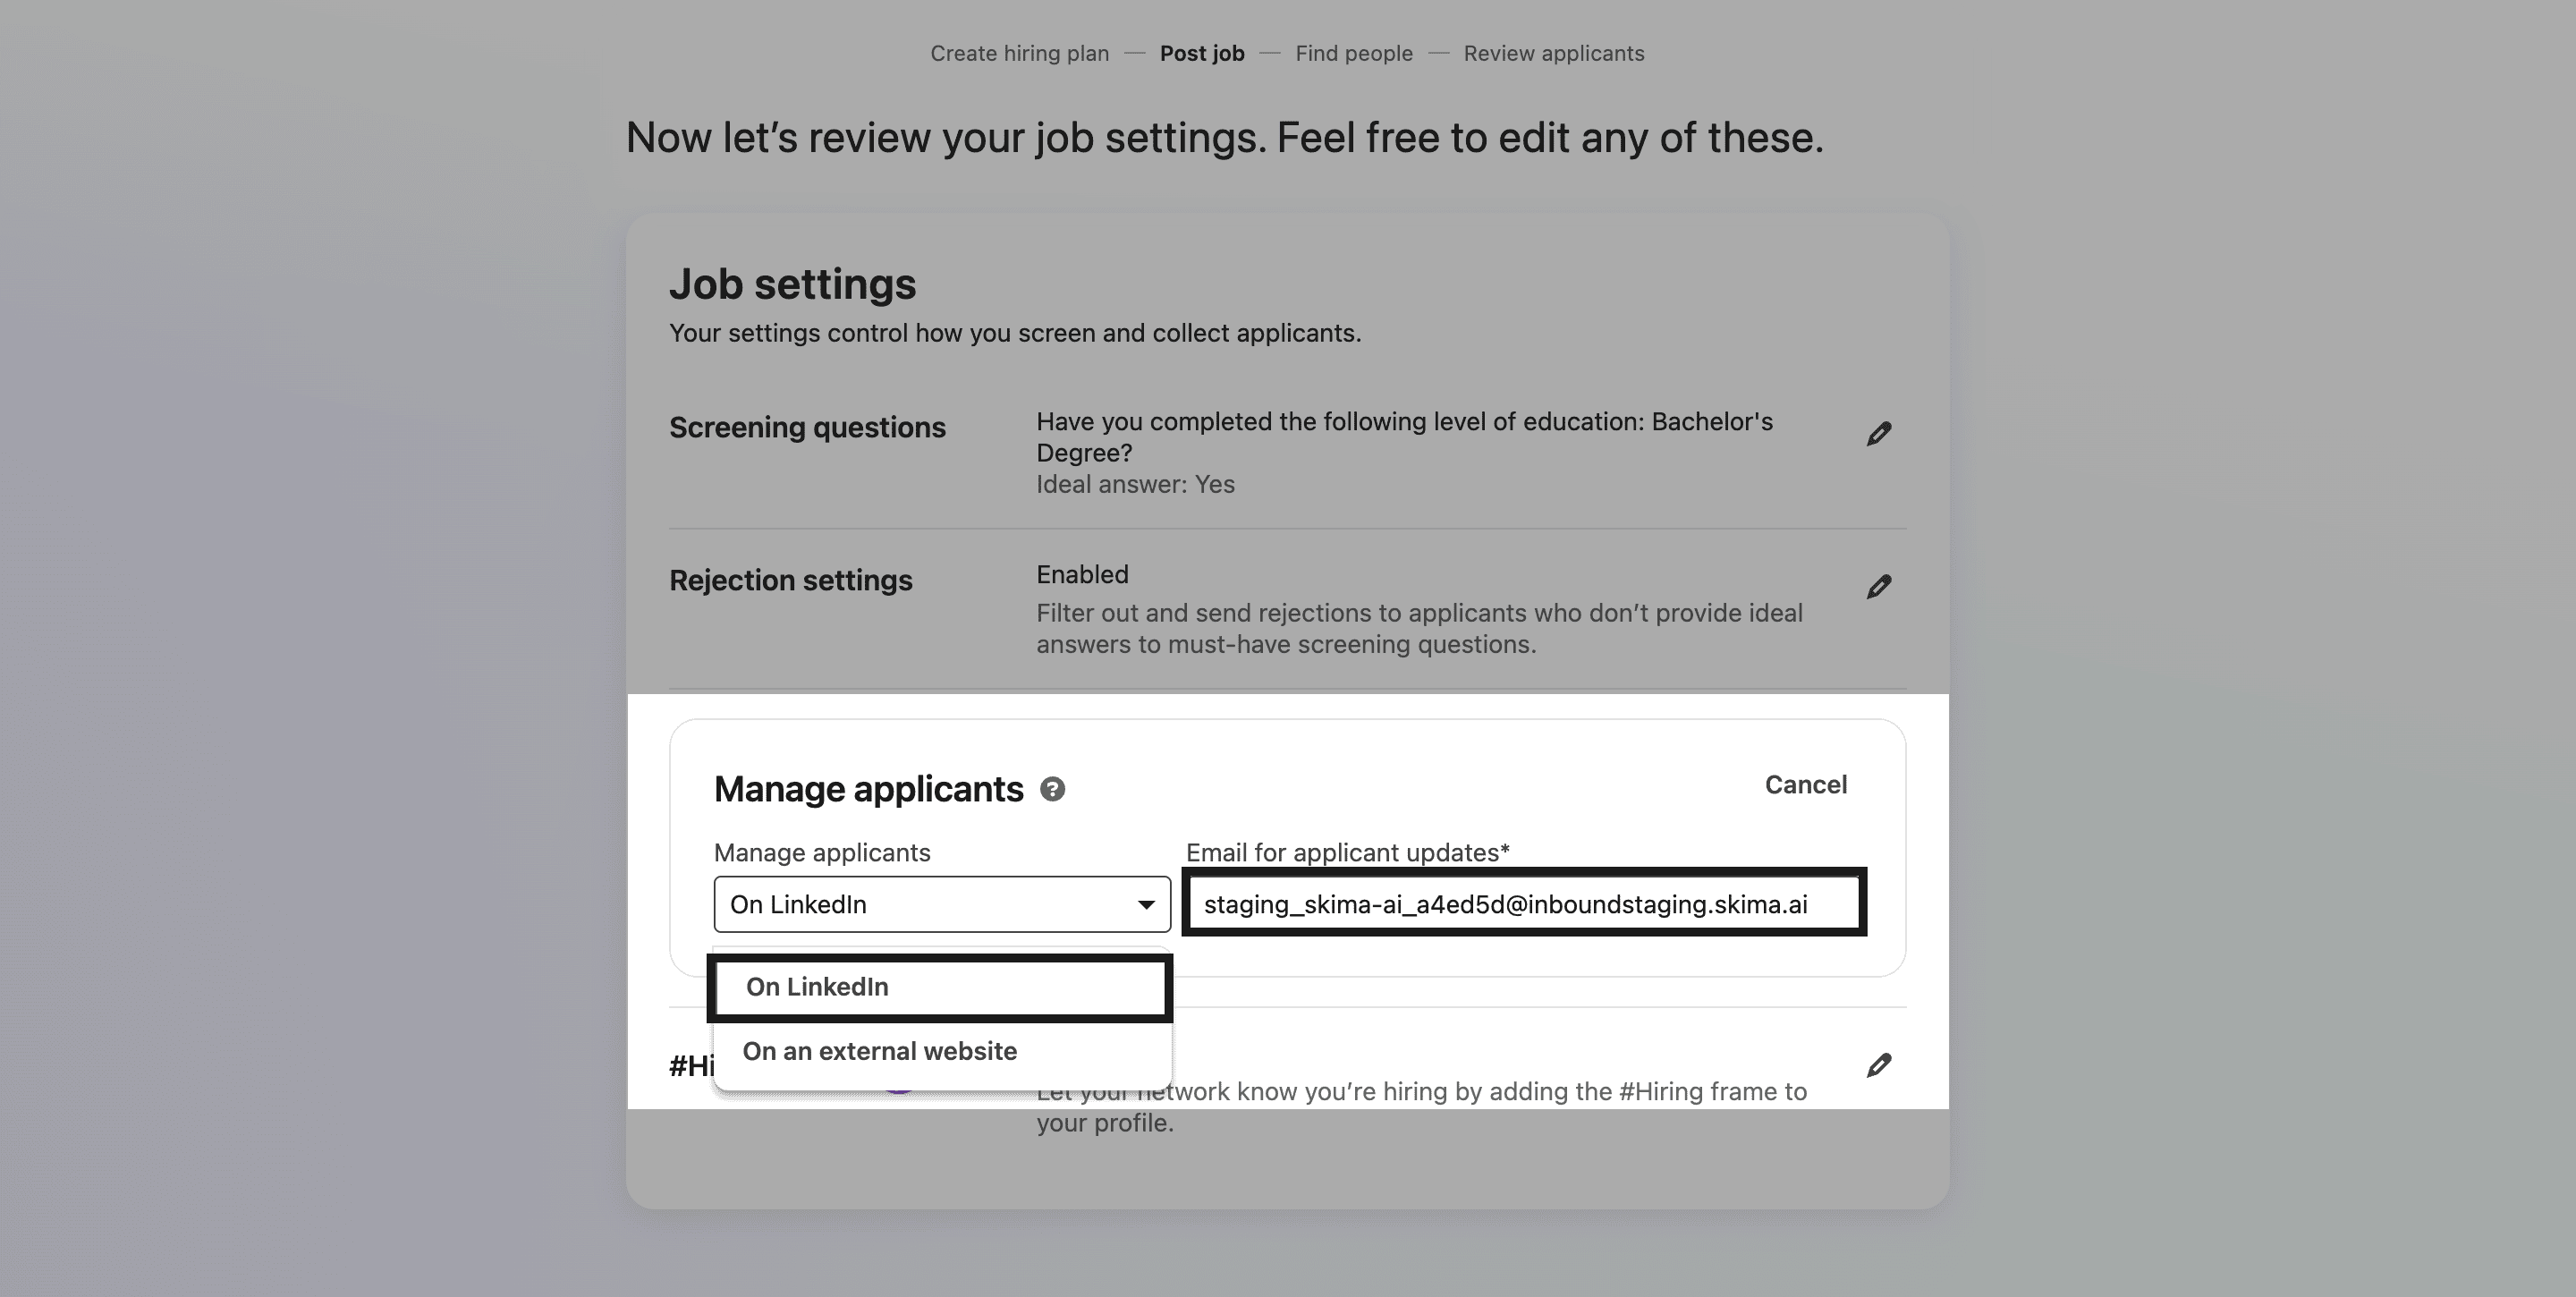
Then, paste your Skima AI forwarding email into the “Email for applicant updates” field. Any candidate who applies through Easy Apply will be imported and scored in Skima AI right away.
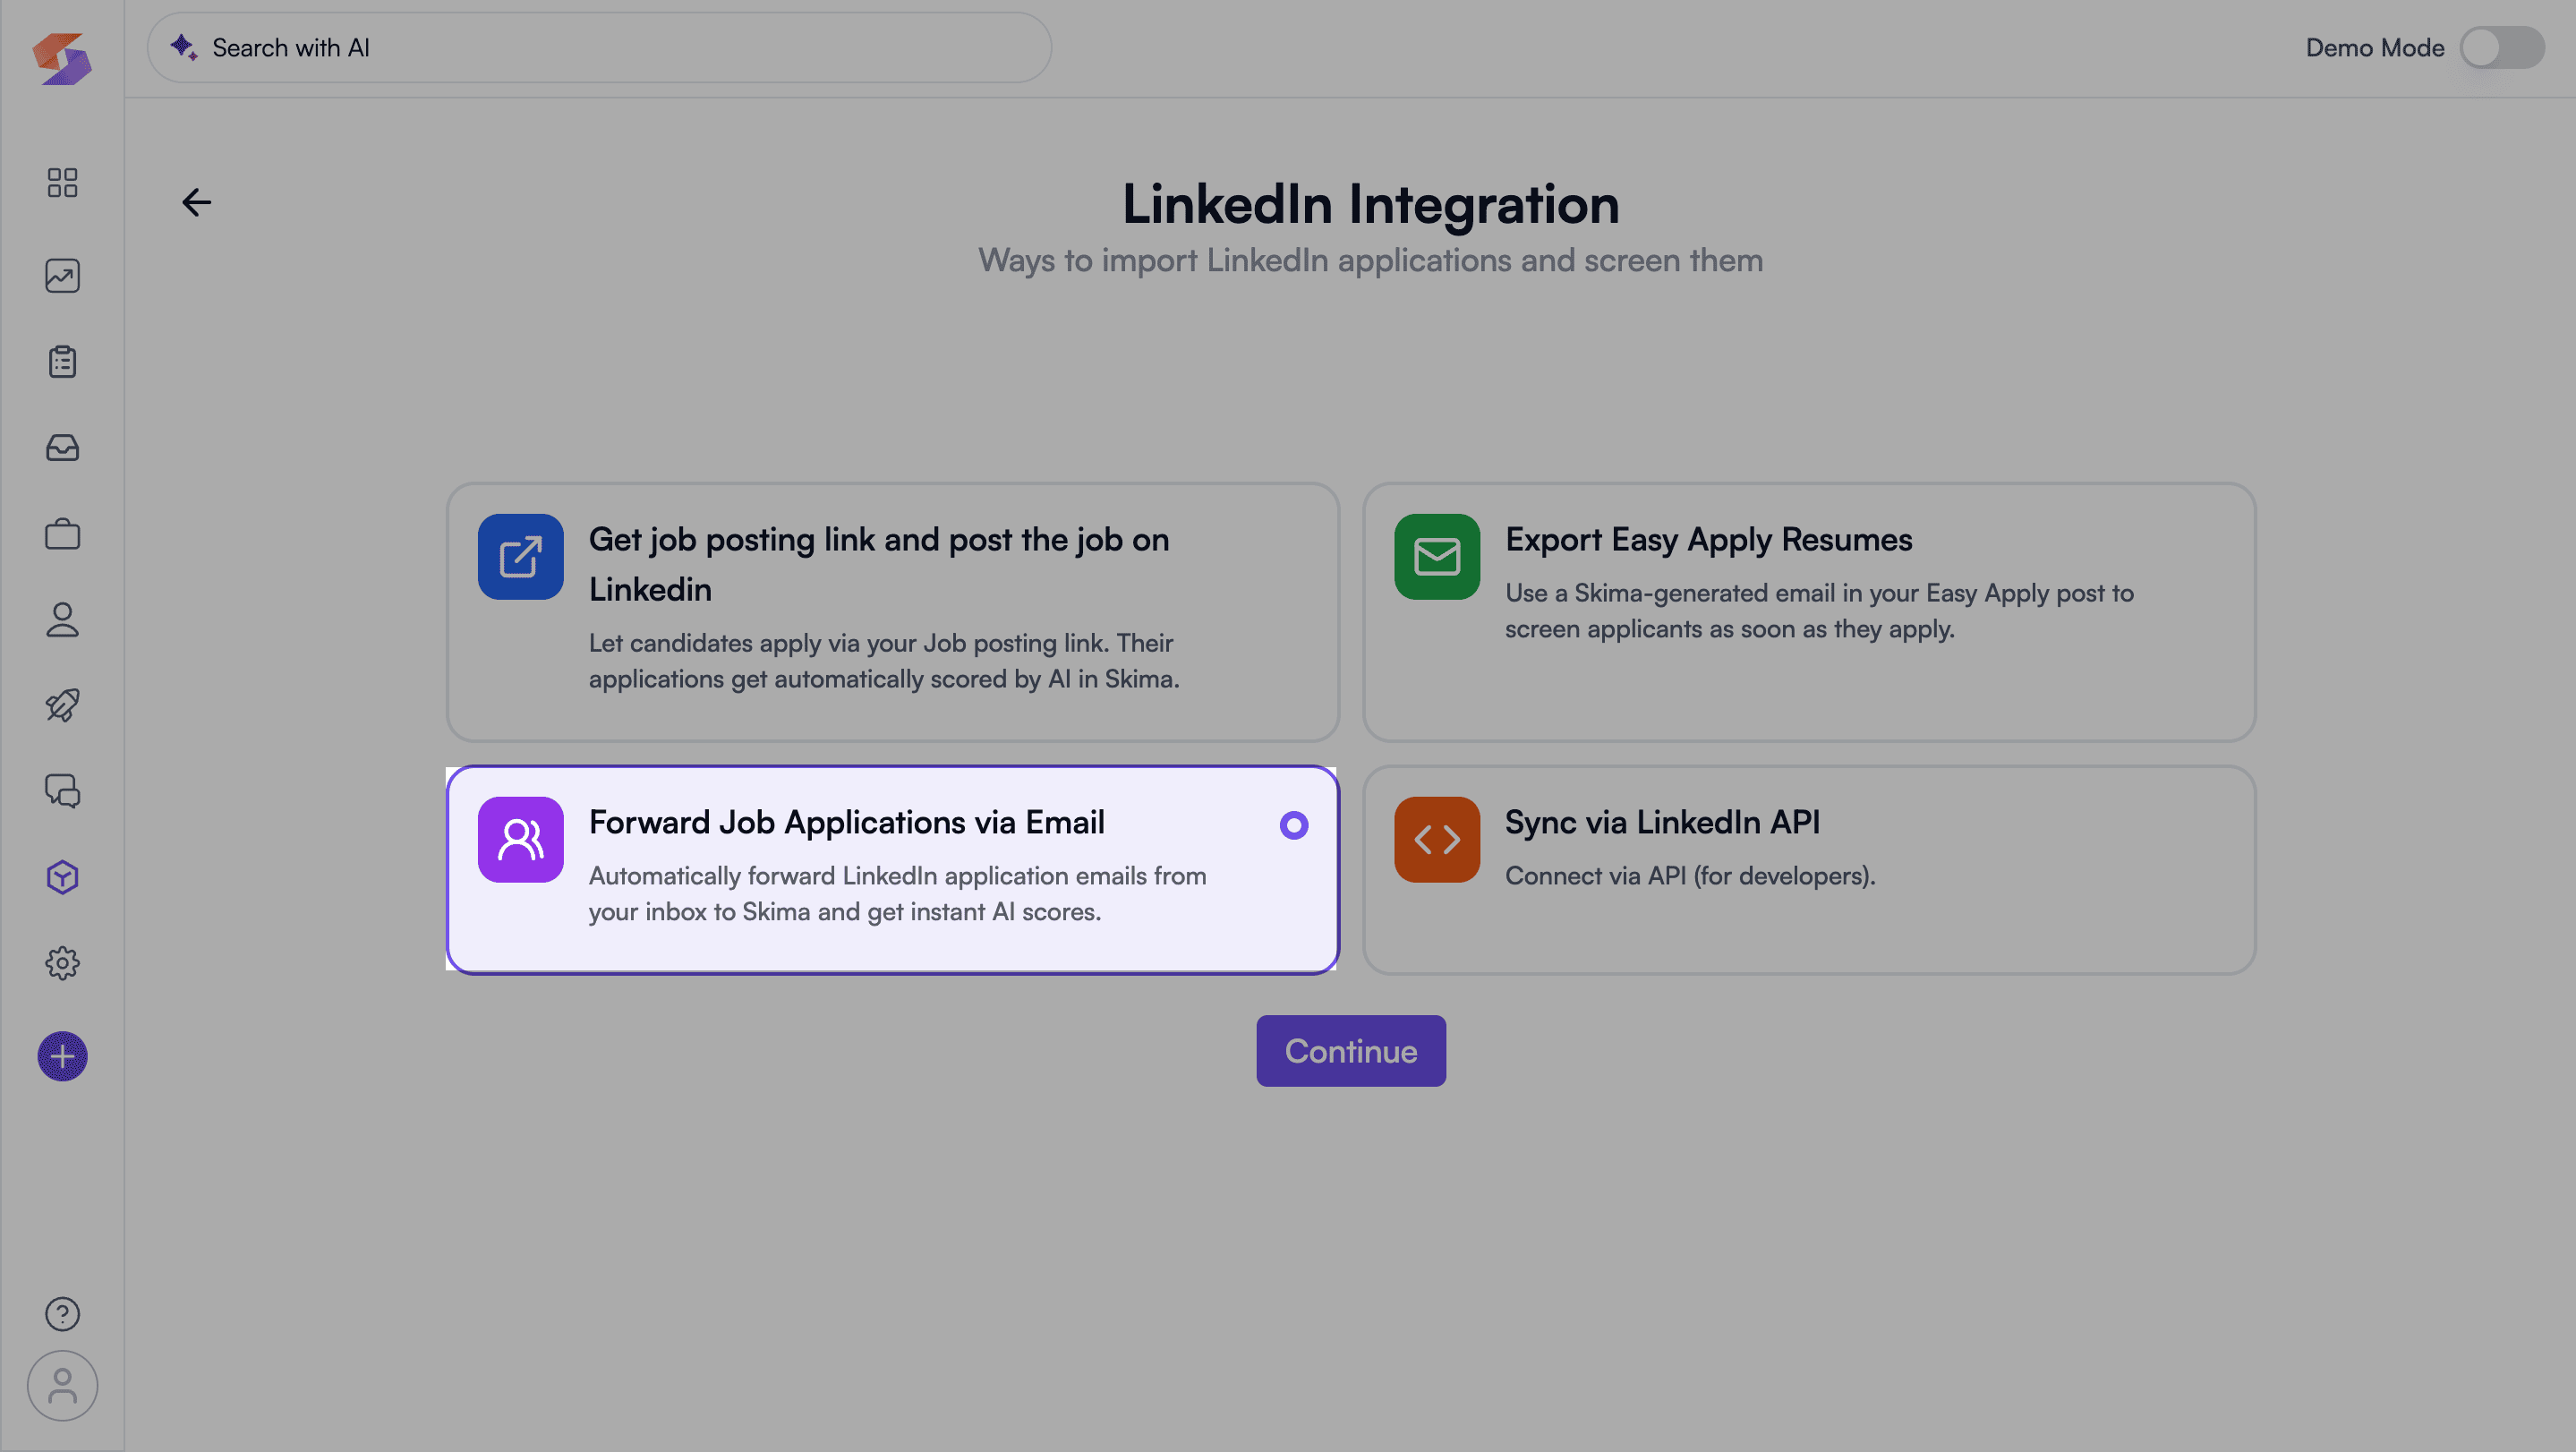
3. Forward Job Applications via Email
Already receiving job applications in your email? You can forward those emails to Skima AI and automatically match and score the candidates. Save significant time in 5 easy steps:
1. On the LinkedIn Integration page, click “Forward Job Applications via Email.” Then, click “Generate your forwarder email," and copy it.
2. Click “Generate your forwarder email” and copy it.

3. Open Gmail or any email service you use. Then, log in to the account where you receive LinkedIn applications.
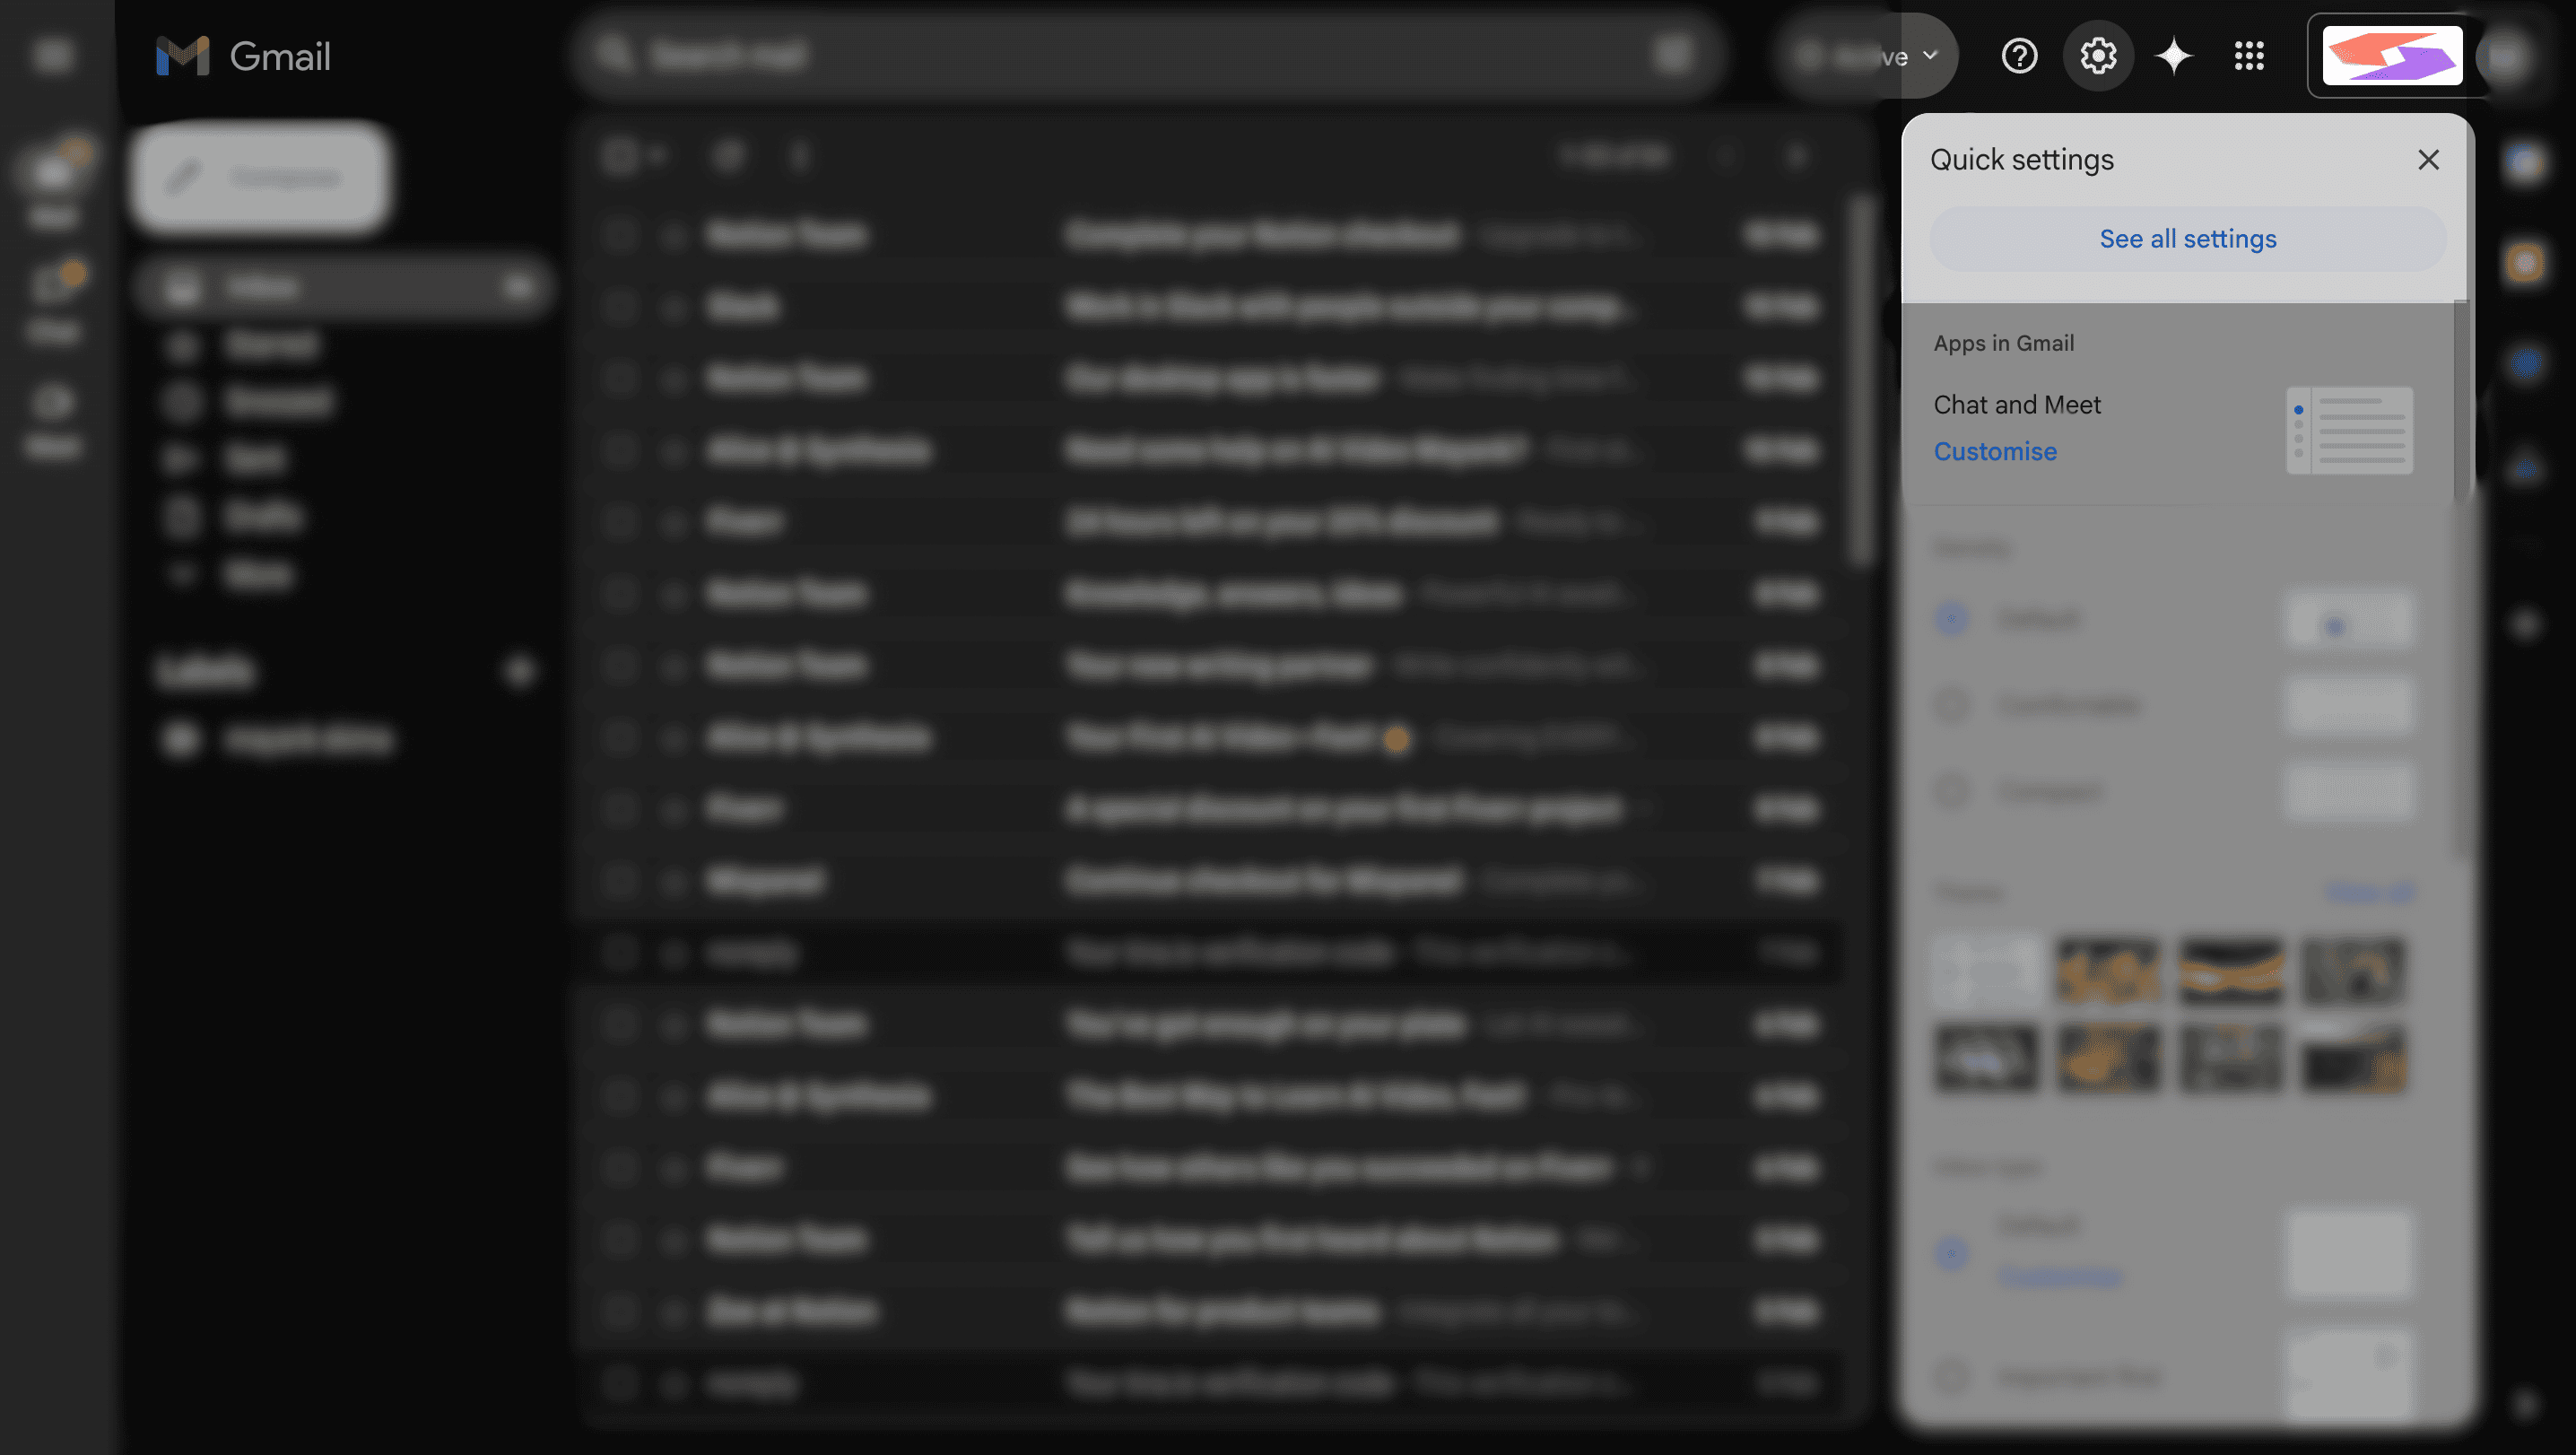
4. Click the Settings (⚙️) icon → Select “See all settings."
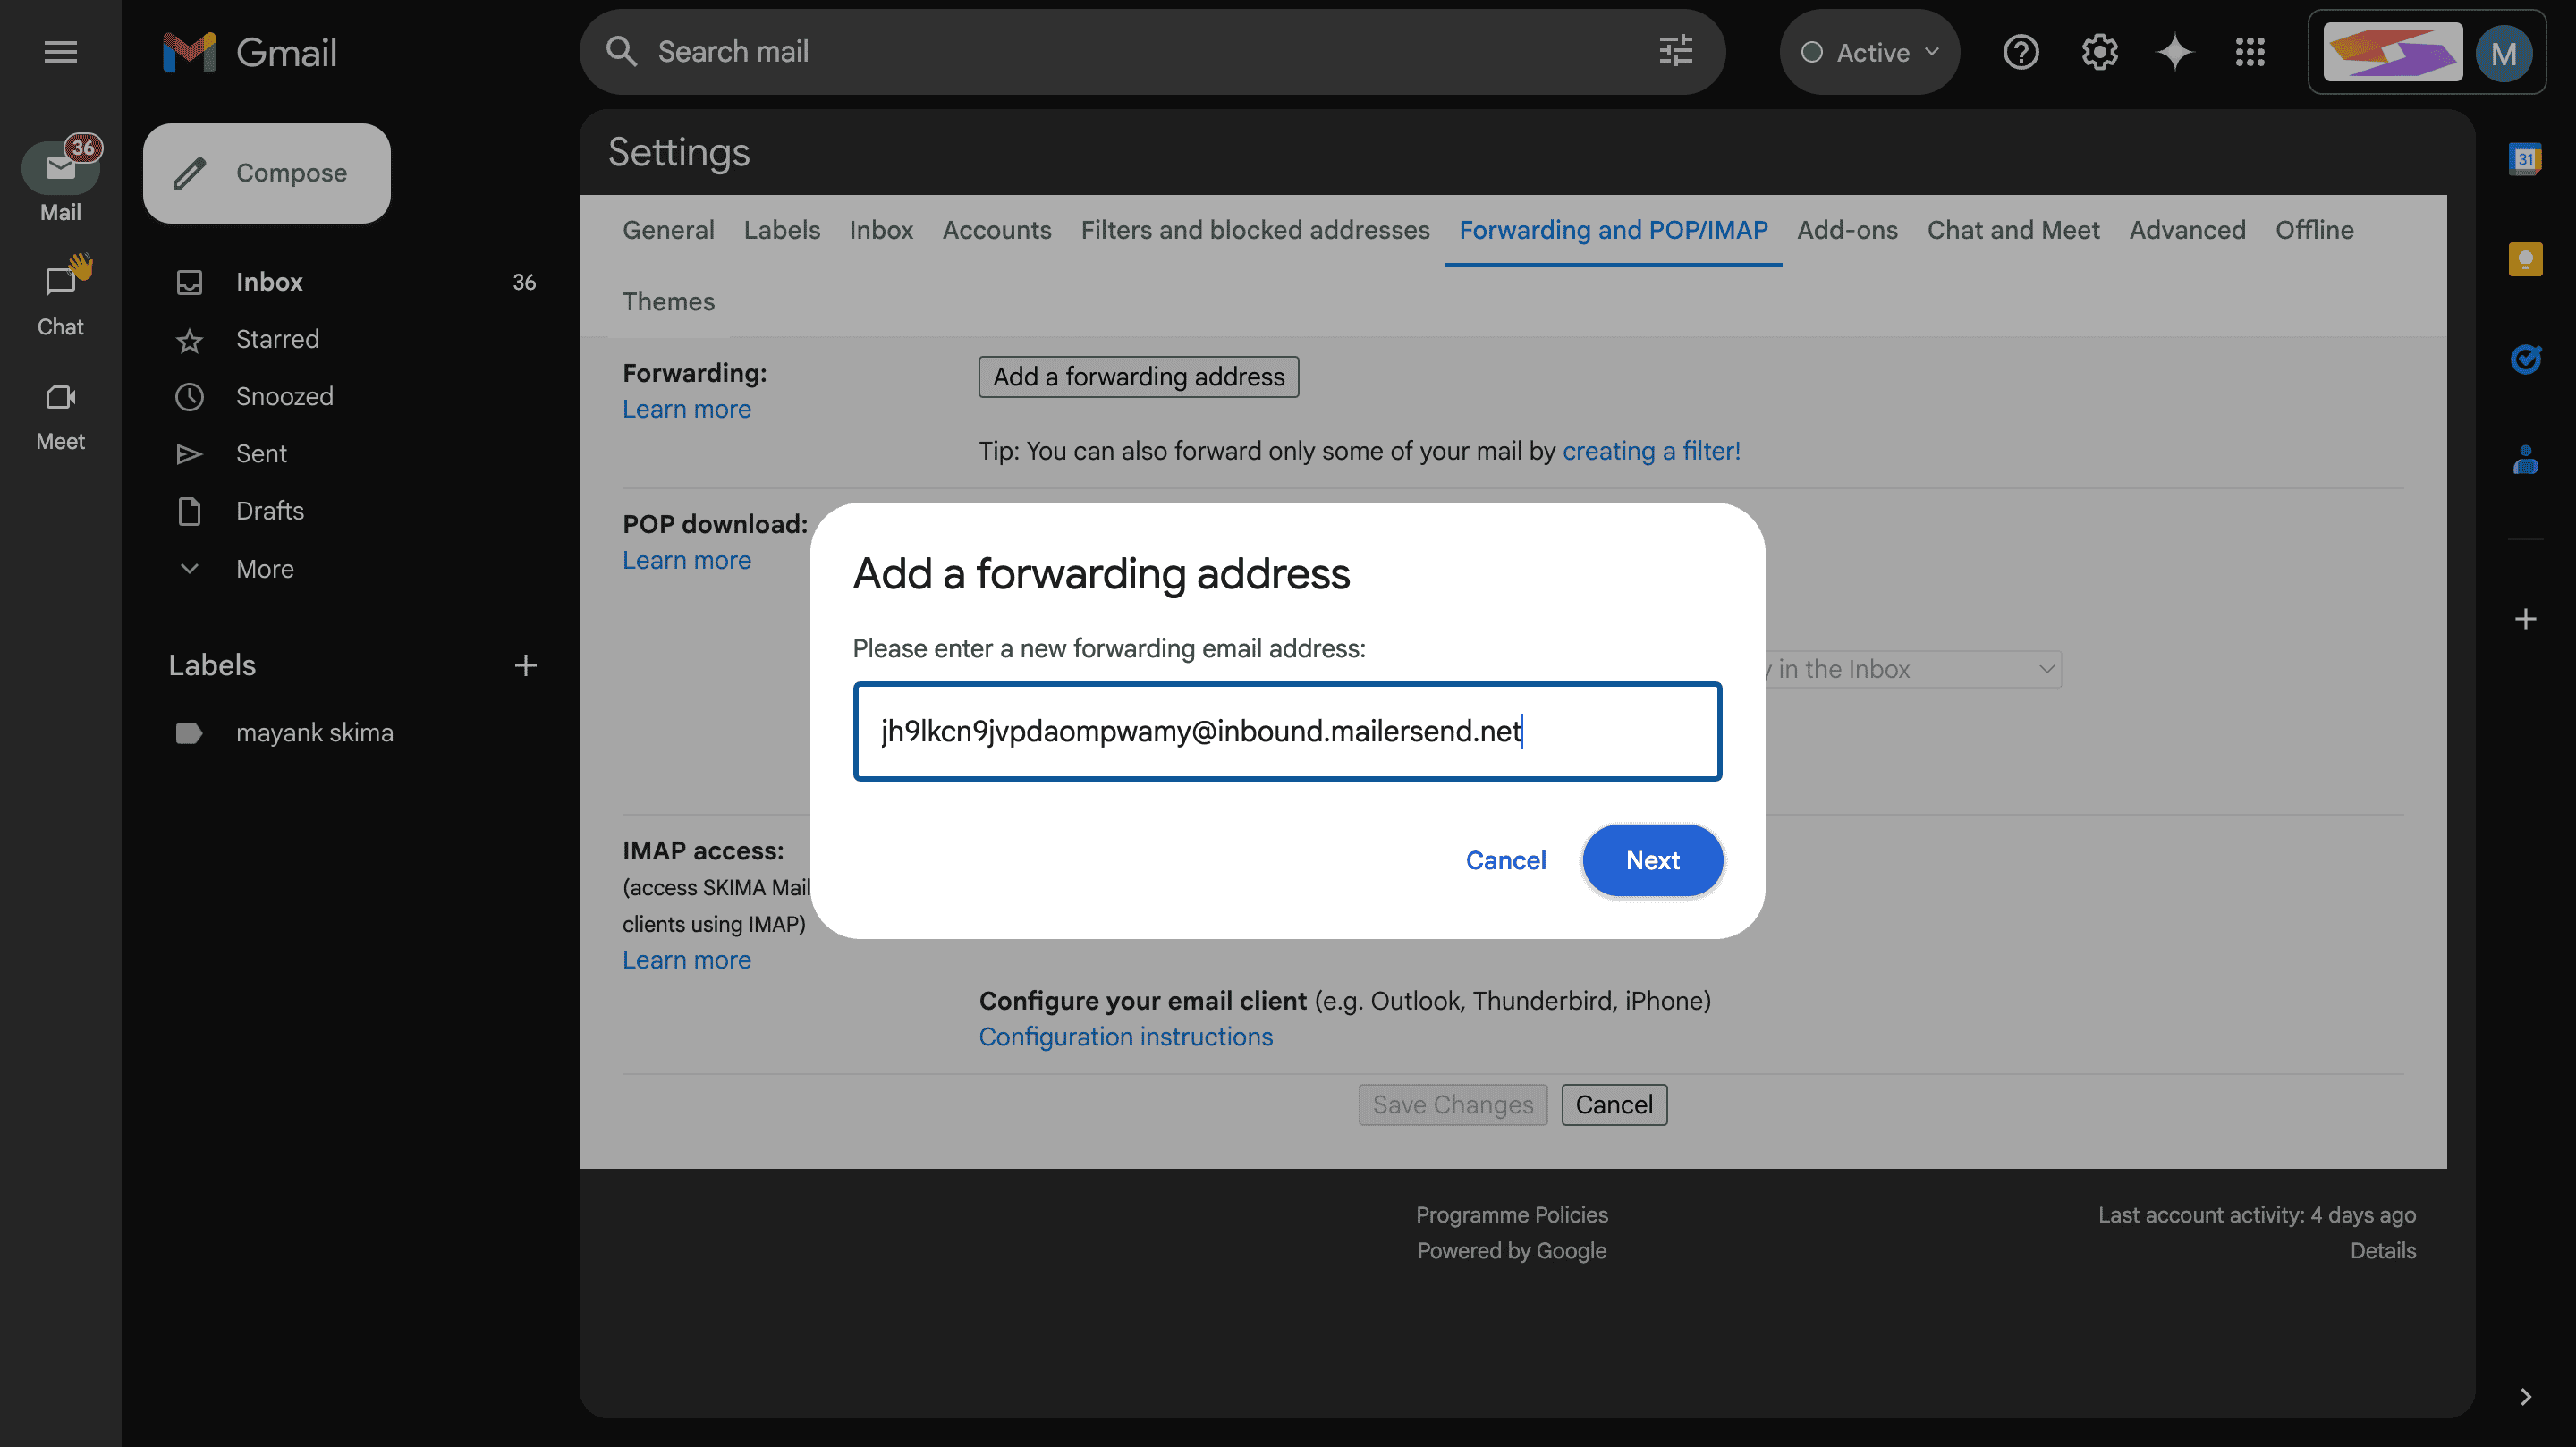
5. Go to the Forwarding and POP/IMAP tab. Click “Add a forwarding address” and paste your Skima AI email. Click Next → Confirm. A verification email will now be sent.
Activate Forwarding
- Go to your inbox and find the verification email from Gmail. Open it and confirm.
- Once you verify, Skima AI will receive all forwarded applications and score them automatically.
4. Sync via LinkedIn API
To set up a deeper automated integration, connect Skima AI to LinkedIn using the API.
- Select “Sync via LinkedIn API” in the LinkedIn integration section.
- Click to schedule a call with the Skima AI team for assistance.
With these 4 easy methods, you can export resumes from LinkedIn easily. After that, you can manage them in Skima AI to boost your recruitment workflow.
Summary - Export Resume From LinkedIn
Exporting resumes from LinkedIn is easy with Skima AI. Recruiters have 4 effective options: Email Forwarding, Easy Apply Integration, Career Page Redirection, and Sync directly via the LinkedIn API.
These methods simplify resume collection, bringing all LinkedIn applications into one dashboard. Skima AI enhances the import process for both high-volume and specialized roles.
Once resumes are in the system, the real magic begins. Skima AI doesn’t stop at resume collection. Every imported resume is parsed and scored using AI-powered screening, giving each applicant a data-backed score based on their fit for the job.
This allows hiring teams to filter out mismatches and focus only on top applicants. You can also segment candidates by skill, location, or industry and launch targeted outreach campaigns tailored to each group.
Frequently Asked Questions
1. How to download CV from LinkedIn job post?
You can’t bulk download CVs directly from LinkedIn. Instead, use tools like Skima AI to automatically collect all resumes in one dashboard without manual effort.
2. What is the LinkedIn resume exporter tool?
A LinkedIn resume exporter tool, like Skima AI, automates resume collection from job posts. It parses the data and organizes it for easy filtering, scoring, and outreach.
3. Can recruiters export resumes from LinkedIn Easy Apply?
Yes, using Skima AI’s Easy Apply Integration, resumes from Easy Apply applicants go straight to your dashboard. This makes everything faster and more organised.
4. Is it legal to export resumes from LinkedIn job posts?
Yes, if candidates have applied to your job post and given consent. Skima AI only processes resumes shared directly by applicants through your job listings.
5. How to download resume from LinkedIn
You can’t bulk download CVs directly from LinkedIn. Automate the process with platforms like Skima AI. It collects, scores, and segments resumes directly from LinkedIn. This helps you manage high volumes without losing top talent in the clutter.