


















Custom Fields: Track What Matters
Create custom data fields for jobs and candidates
4 min read
- Create custom fields across Jobs, Candidates, and Applications to track workflow-specific data directly inside Skima AI.
- Update field values within the record view and instantly reflect them in list columns for real-time visibility.
- Customize list views using Configure Table View to surface, reorder, or hide fields based on recruiter needs.
- Replace external spreadsheets with structured, ATS-native data tracking for faster scanning and more consistent workflows.
Track What Matters
Recruiters can now create custom fields for Job, Candidate, and Application entities directly from Settings, then update those values inside the relevant record view. Once populated, the same field automatically appears as a configurable column in the list page, making it easy to track workflow-specific data like headcount, ownership, region, or hiring priority exactly where decisions happen.
Create and Surface
1. Go to Settings → Preferences → Custom Fields
2. In Custom Fields, select the entity you want to customize: Job, Candidate, or Application
3. Click on 'Add Field' → The Create Custom Field modal will appear → Fill in the required details → Click on 'Save'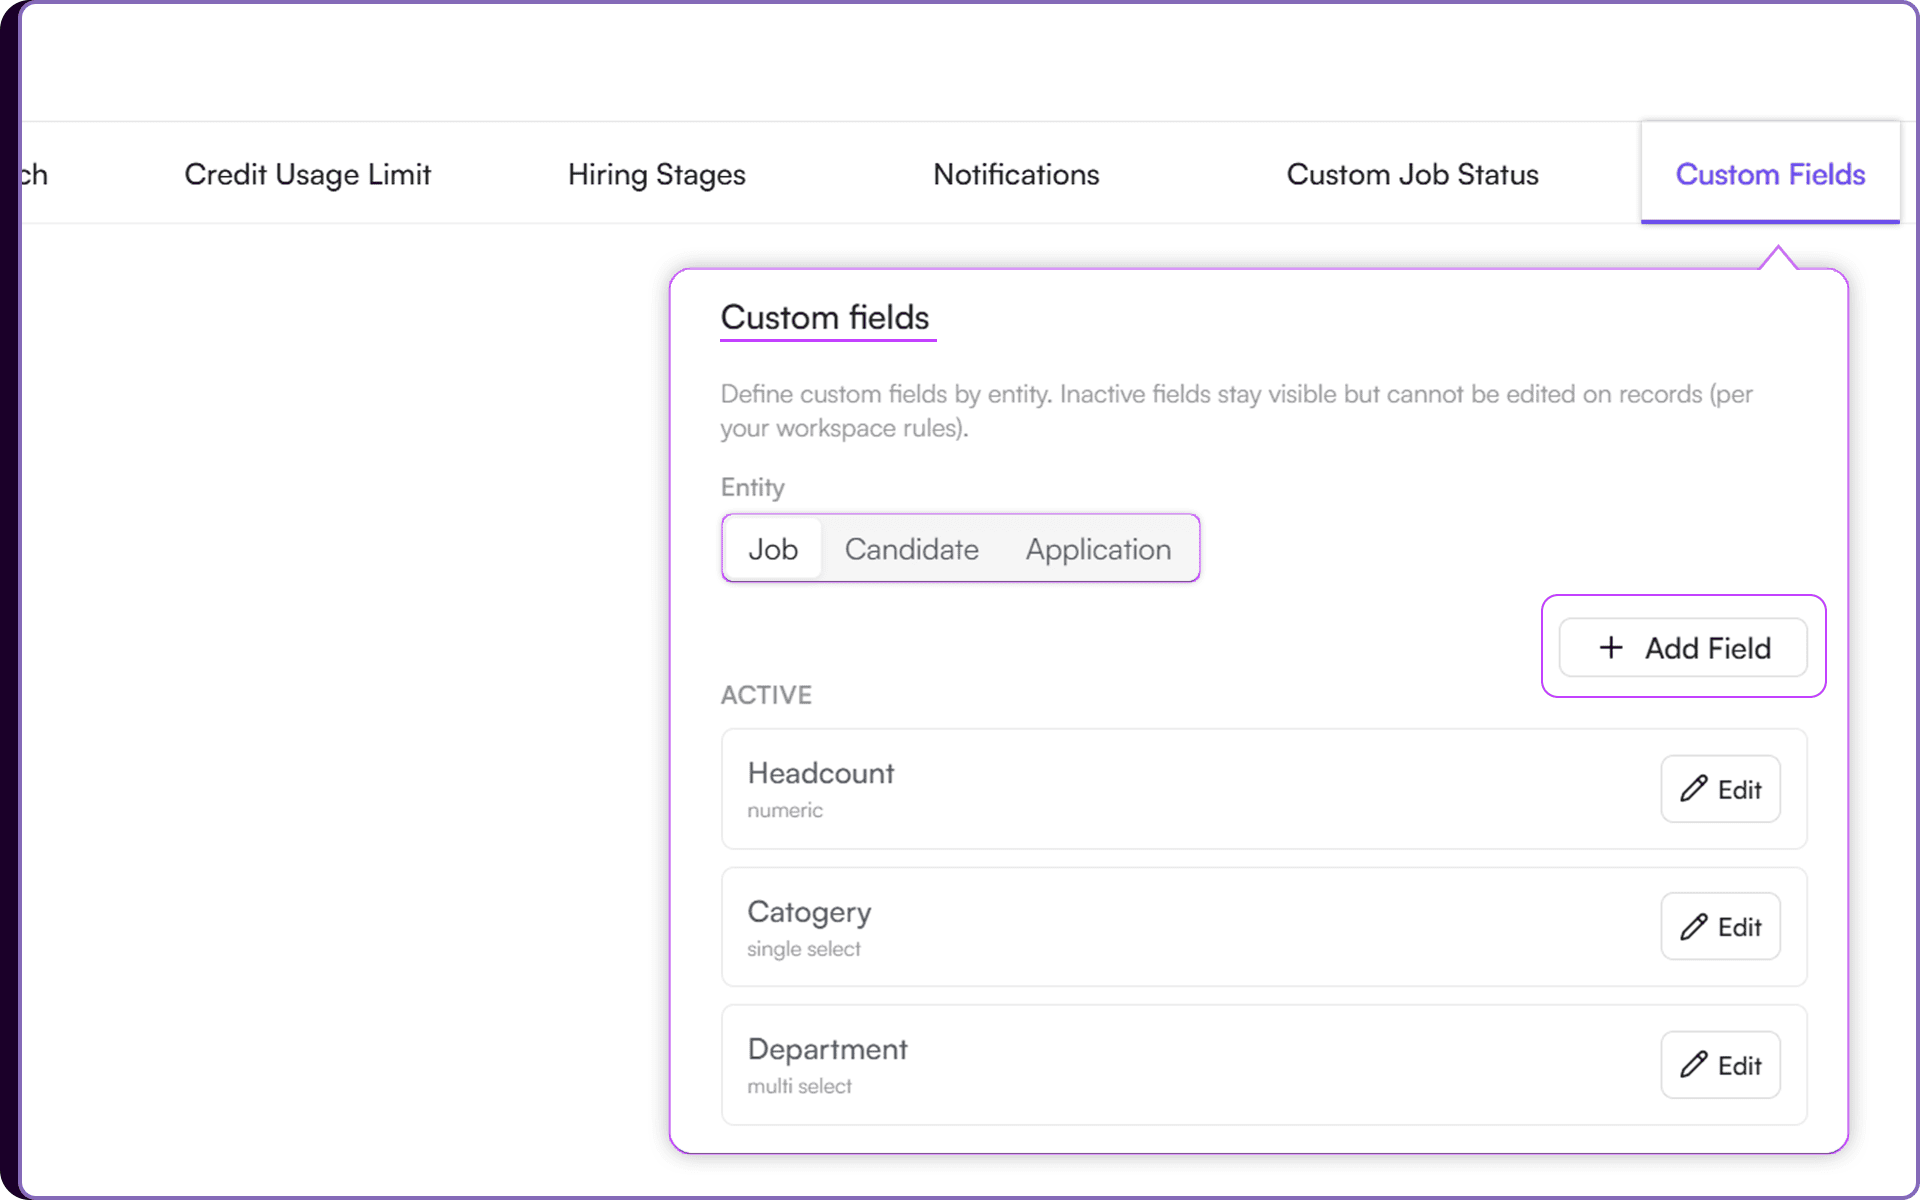 The new custom field will now appear under the selected entity
4. Open the relevant record based on the entity selected:
For Jobs → Go to Jobs → Open any job → View JD → On the left side, open Custom Fields
For Candidates → Go to Candidates → In Actions, click the three dots beside any candidate → View Custom Fields
For Applications → Open a specific job → View Candidates → Click the three dots beside any candidate → View Custom Fields
5. Edit the custom field values and click on 'Save'
6. Review where the field becomes visible:
Job / Candidate → Return to the main list page where the same field name will appear as a column → Use Configure Table View to move, hide, or unhide the field.
Application → Jobs → View Candidates → Filter → Show More Filters → View Custom Fields → Select the field → Click Apply to filter candidates using that custom field.
Turn Fields Into Live Workflow Data
Once a custom field is created, it becomes part of that entity’s record structure across Skima AI . For example, a field like Headcount created for Job can be updated directly inside the JD view, and the entered value immediately becomes visible in the Jobs list as a column.
This gives recruiters a structured way to track workflow-specific data points like open seats, business priority, internal owner, visa needs, or region tags while keeping that information visible during day-to-day scanning and decision-making.
Replace Spreadsheet Tracking
This update helps teams move critical hiring context out of notes and spreadsheets into the same ATS workflow where recruiters already operate. Instead of switching tabs to verify values like headcount or ownership, the information remains visible at the list level.
For high-volume hiring, this means faster job comparison, cleaner reporting habits, and much better consistency in how recruiters track the data points that matter most to their process.